this as been a bit of fun ,while the main work wasn't in play ,i'll come back too it later (when the new tap comes) but i'm back on the nets this weekend & will hopefully get it all nearly done ready for the spreader block and if the bsf tap fails i'll force the bolt into it and glue it in .
my next landing net project
-
Chavender

- Eel
- Posts: 2245
- Joined: Tue Jan 03, 2012 11:49 am
- 12
- Location: Ilkeston, Derbyshire
- Contact:
Re: my next landing net project
well I tried the bsw tap ,it sort of worked I've been using a quick release connectors threads to test the net head ,I used the bsw tap it shave a little metal off the threads the connector went in a couple more threads but not enough (pat on the back for all the chaps ,who know I was barking up the wrong tree ,well I had too try ) ,so that Idea failed ,I was hoping to maybe shave the threads so they allowed a loose fit but it didn't work I just managed too clean the threads up  ,so i'm still at square one ,I didn't order a bsf tap as I didn't think it would work trying to cut new fine threads out of coarse threads . so I've ordered a bsf tap now so I can try that (but don't hold out much hope) I have some bolts that are the correct threads so if the bsf fails to work ,I can make one of the bolts fit by brute force and ignorance .
this as been a bit of fun ,while the main work wasn't in play ,i'll come back too it later (when the new tap comes) but i'm back on the nets this weekend & will hopefully get it all nearly done ready for the spreader block and if the bsf tap fails i'll force the bolt into it and glue it in .
this as been a bit of fun ,while the main work wasn't in play ,i'll come back too it later (when the new tap comes) but i'm back on the nets this weekend & will hopefully get it all nearly done ready for the spreader block and if the bsf tap fails i'll force the bolt into it and glue it in .
I try to be funny... but sometimes I merely look it! Steve
-
QuinetteCane

- Rudd
- Posts: 329
- Joined: Fri Nov 30, 2012 8:34 pm
- 11
Re: my next landing net project
There is always the drill and pin as well to assist in locking up to eliminate play in the final fitting if needed.
Keep going !
Keep going !
-
Chavender
- Eel
- Posts: 2245
- Joined: Tue Jan 03, 2012 11:49 am
- 12
- Location: Ilkeston, Derbyshire
- Contact:
Re: my next landing net project
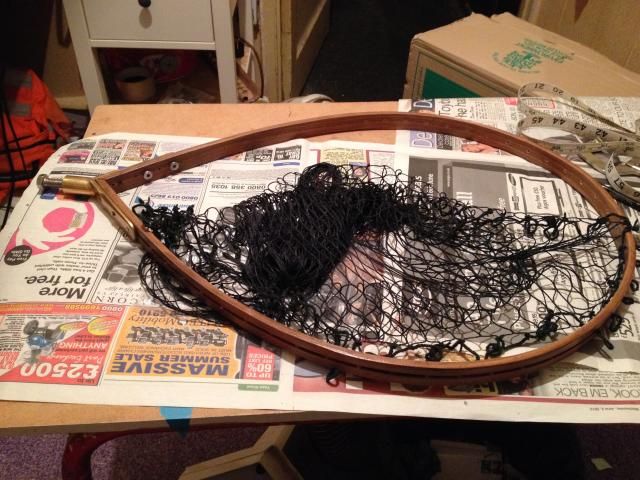
Now I have a small vintage hoop net in the crabtree style ,that i'd refurbished a year or two ago ,at the time the only net I could get for it was a medium net ,its mesh a tad too big for the size of fish I tend too catch ,so as its in near new condition my plan is to transfer the medium net too the new frame and re-net the small one .
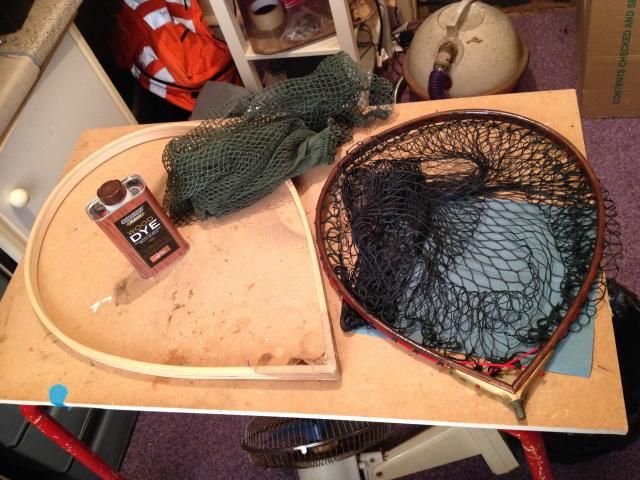
So first job is to remove the net from the frame ,simple process of cutting the retaining cord
then pull the cord back out through the nets loops ,I have another net for the small frame ,but that'll wait for now

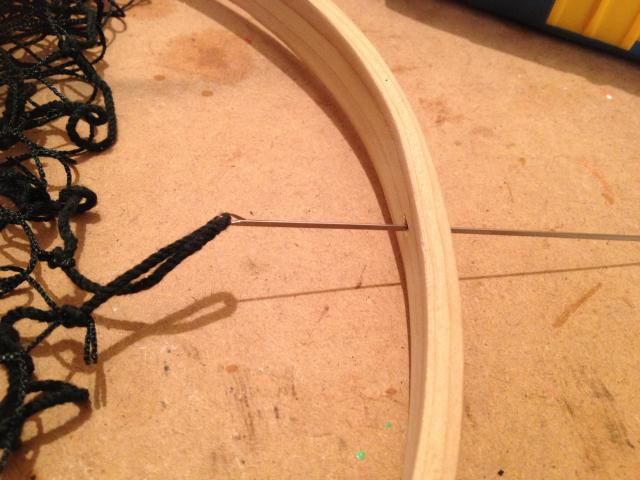
I've Took this net and offered it upto the new frame ,and drilled the top dead centre hole
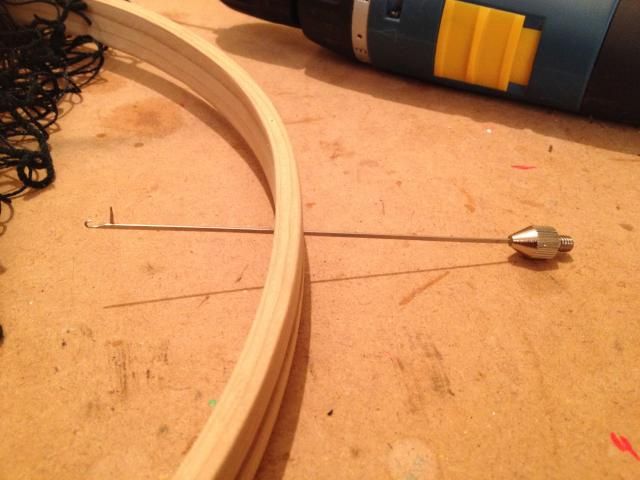
then taking a boilie hair rig tool and pushing it through the (test) hole
and pulled the middle loop through the frame to check the fit
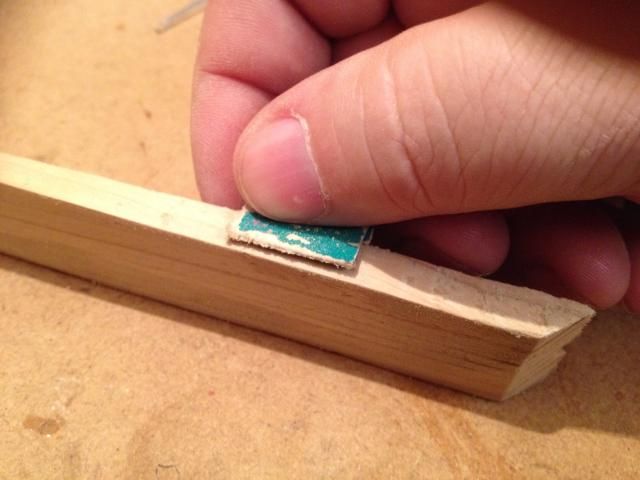
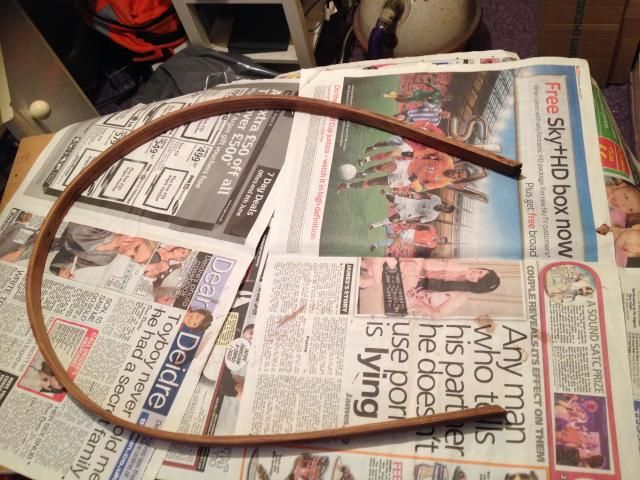
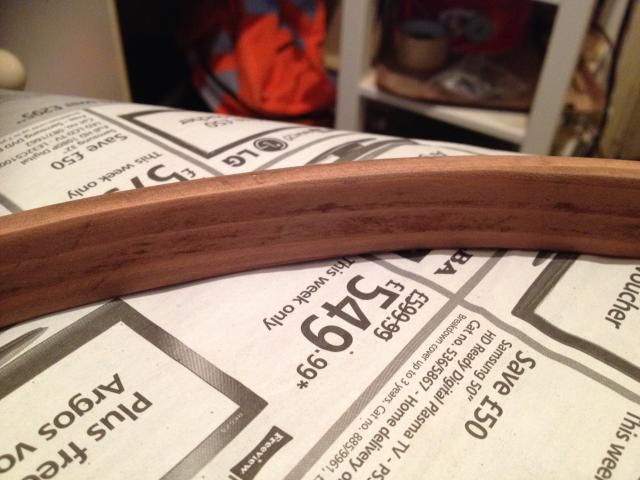
all looks good ,i'll do a proper fitting & marking/spacing the holes for the loops after the first coat or two of varnish / clear tuff coat .but I noticed that after nearly two years of the frame ends being taped together ,I doubt they was expected to be this way for this long ,but somethings you just can't rush .So a little light sanding of the area to remove any tape residue was required
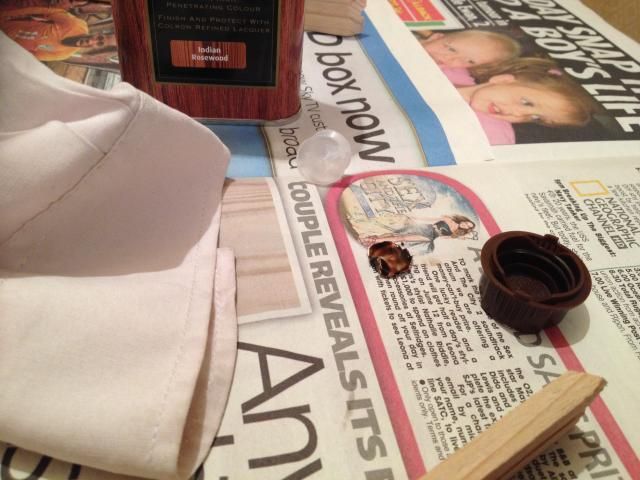
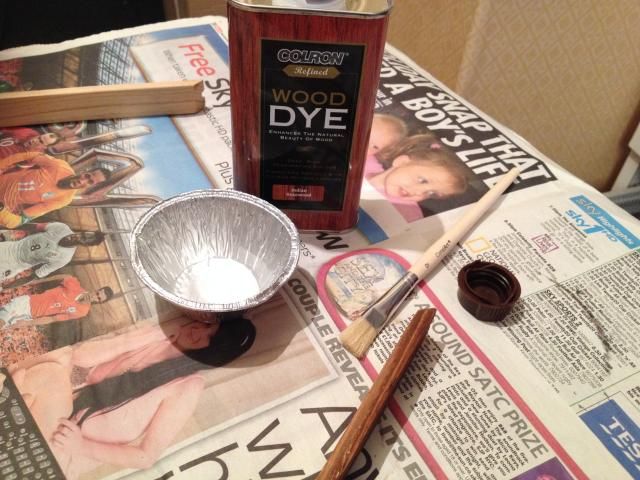
I'd brought some wood dye ,to darken the pale wood up a bit and chose Indian rosewood as I wanted a lightish brown finish
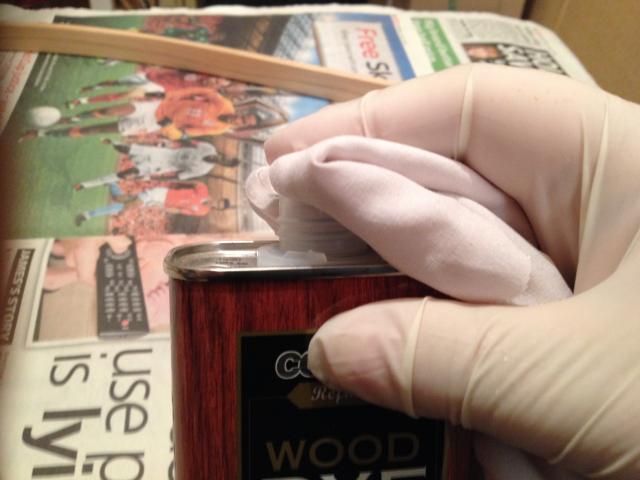
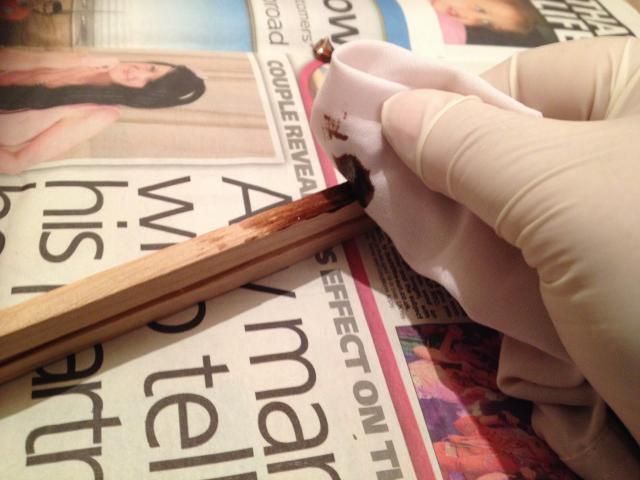
theres two good ways to apply wood dye ,one is ragging ,using lint free rag to rub the dye into the wood ,I had some disposable gloves for this job .as I've used wood dyes in the past and things could get messy & nobody wants brown stained fingers smiley: embarrassed ,just tip a bit of dye onto the rag .
Then rub that into the wood forcing it into the grain ,and spreading it evenly along the wood.
or you could tip some dye into a pot or re-use a cake base (ummm cake) and using a stiff nylon artists brush to apply the dye
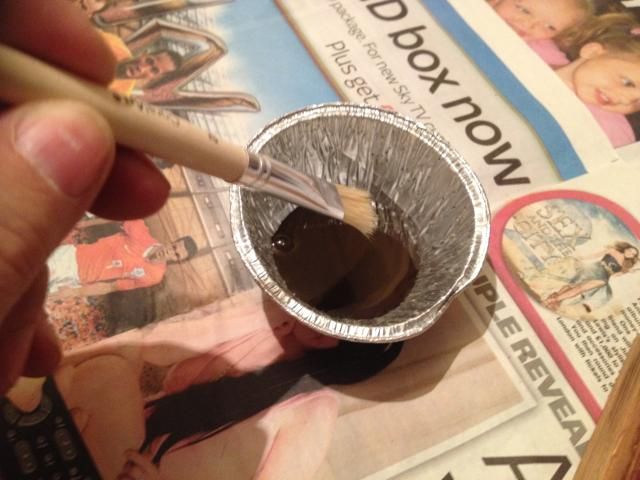
then using a lint free rag ,rub the dye in ,and in the process remove any excess ,getting a nice even covering
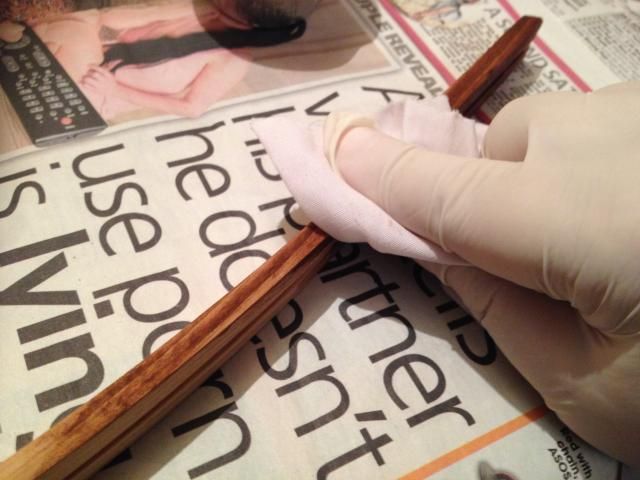
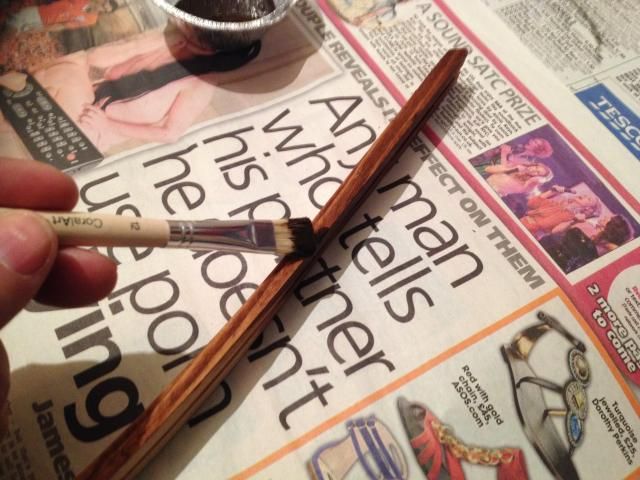
well I gave it a full all over covering
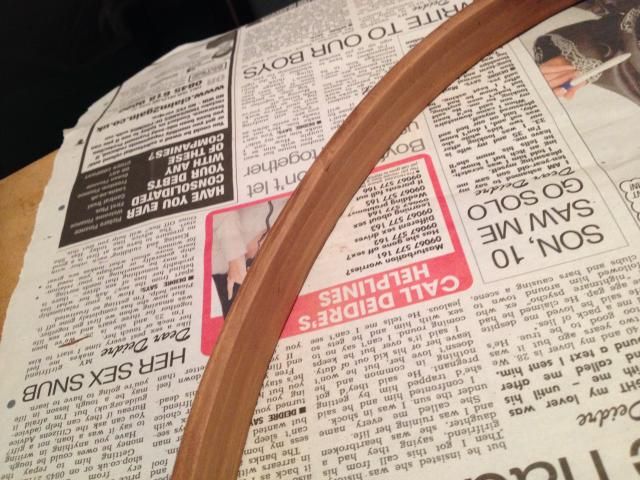
and when dry (its dries really quick but I left it overnight anyway) the colour lightens as it dries showing all the grain detail
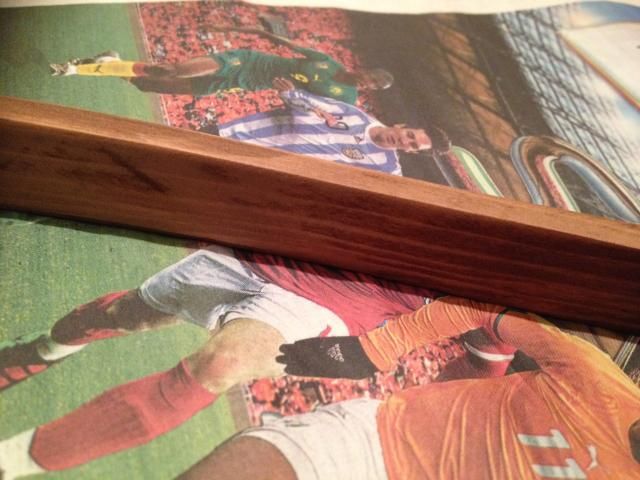
next job is to add some protection for the wood to guard against being knocked & chipped i'm going to use ez-kote A laminating and finishing clear resin ,I normally only use this for floats that need a extra hard finish (blue Styrofoam etc ) that lines may cut into otherwise ,its not cheap at nearly £20 for a small bottle ,but it is good stuff ,its a little glupey but levels as it cures ,best applied by brush (with long strokes to even it out)
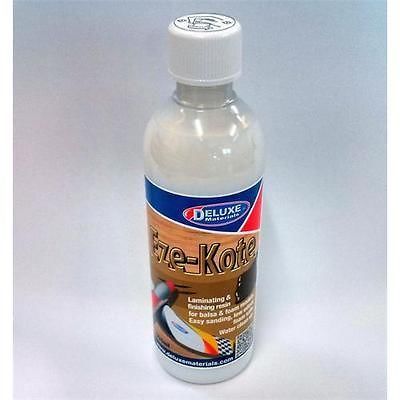

I've given the frame one coat so far
although its touch dry in a matter of twenty minutes or so ,i'm leaving it a couple of days (ok i'm waiting for the threading twine to arrive and the (bsf 3/8ths) tap to arrive) Then i'll mark out and drill the remaining holes for the nets loops to fit through ,then one or two final coats of the resin ,before I fit the net and lash it too the frame.
So first job is to remove the net from the frame ,simple process of cutting the retaining cord
then pull the cord back out through the nets loops ,I have another net for the small frame ,but that'll wait for now
I've Took this net and offered it upto the new frame ,and drilled the top dead centre hole
then taking a boilie hair rig tool and pushing it through the (test) hole
and pulled the middle loop through the frame to check the fit
all looks good ,i'll do a proper fitting & marking/spacing the holes for the loops after the first coat or two of varnish / clear tuff coat .but I noticed that after nearly two years of the frame ends being taped together ,I doubt they was expected to be this way for this long ,but somethings you just can't rush .So a little light sanding of the area to remove any tape residue was required
I'd brought some wood dye ,to darken the pale wood up a bit and chose Indian rosewood as I wanted a lightish brown finish
theres two good ways to apply wood dye ,one is ragging ,using lint free rag to rub the dye into the wood ,I had some disposable gloves for this job .as I've used wood dyes in the past and things could get messy & nobody wants brown stained fingers smiley: embarrassed ,just tip a bit of dye onto the rag .
Then rub that into the wood forcing it into the grain ,and spreading it evenly along the wood.
or you could tip some dye into a pot or re-use a cake base (ummm cake) and using a stiff nylon artists brush to apply the dye
then using a lint free rag ,rub the dye in ,and in the process remove any excess ,getting a nice even covering
well I gave it a full all over covering
and when dry (its dries really quick but I left it overnight anyway) the colour lightens as it dries showing all the grain detail
next job is to add some protection for the wood to guard against being knocked & chipped i'm going to use ez-kote A laminating and finishing clear resin ,I normally only use this for floats that need a extra hard finish (blue Styrofoam etc ) that lines may cut into otherwise ,its not cheap at nearly £20 for a small bottle ,but it is good stuff ,its a little glupey but levels as it cures ,best applied by brush (with long strokes to even it out)
I've given the frame one coat so far
although its touch dry in a matter of twenty minutes or so ,i'm leaving it a couple of days (ok i'm waiting for the threading twine to arrive and the (bsf 3/8ths) tap to arrive) Then i'll mark out and drill the remaining holes for the nets loops to fit through ,then one or two final coats of the resin ,before I fit the net and lash it too the frame.
I try to be funny... but sometimes I merely look it! Steve
-
The Sweetcorn Kid

- Wild Carp
- Posts: 11788
- Joined: Fri Aug 26, 2011 7:09 pm
- 12
- Location: Portsmouth
- Contact:
Re: my next landing net project
Looking great!!
SK
The Compleat Tangler
“Imagination is the real magic that exists in this world. Look inwards to see outwards. And capture it in writing.”
Nigel 'Fennel' Hudson
Click here for my Youtube Channel...
https://www.youtube.com/channel/UCeoyLH ... 5H4u8sTDgA
The Compleat Tangler
“Imagination is the real magic that exists in this world. Look inwards to see outwards. And capture it in writing.”
Nigel 'Fennel' Hudson
Click here for my Youtube Channel...
https://www.youtube.com/channel/UCeoyLH ... 5H4u8sTDgA
-
OldTackle

- Arctic Char
- Posts: 1800
- Joined: Fri Jan 02, 2015 11:40 pm
- 9
- Location: Germany, Lower Saxony
Re: my next landing net project
I love such kind of work. Well done! And well presented!
Chris
Chris
< °) >>><( Christopher )><<< (° >
-
Chavender
- Eel
- Posts: 2245
- Joined: Tue Jan 03, 2012 11:49 am
- 12
- Location: Ilkeston, Derbyshire
- Contact:
Re: my next landing net project
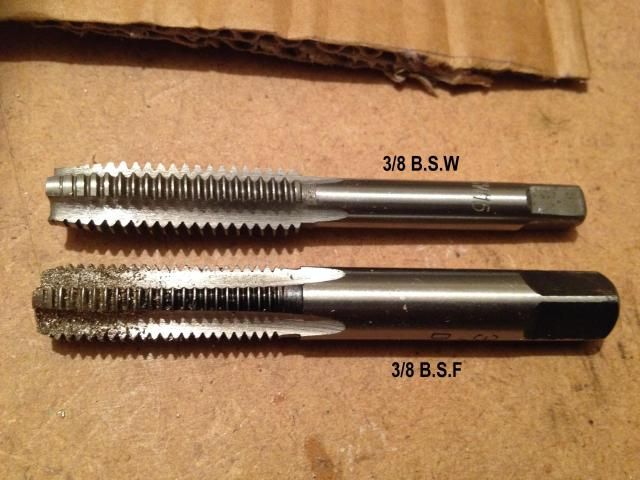
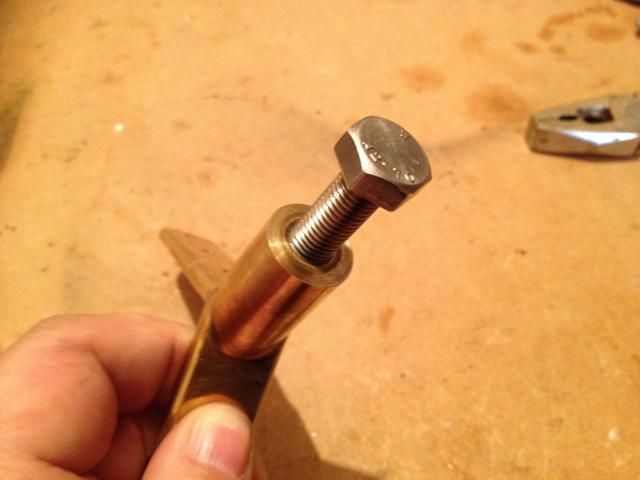
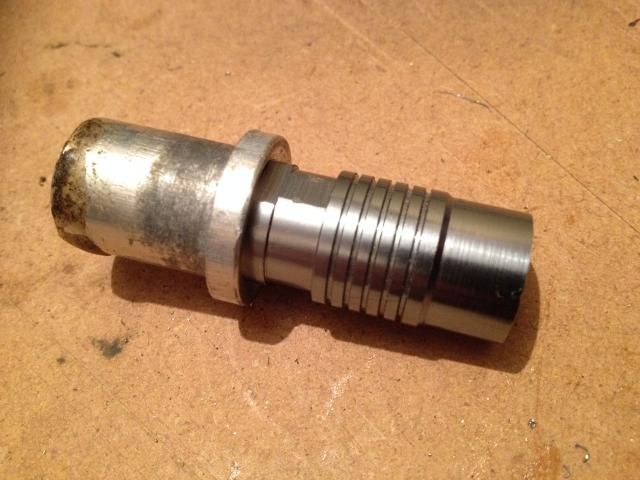
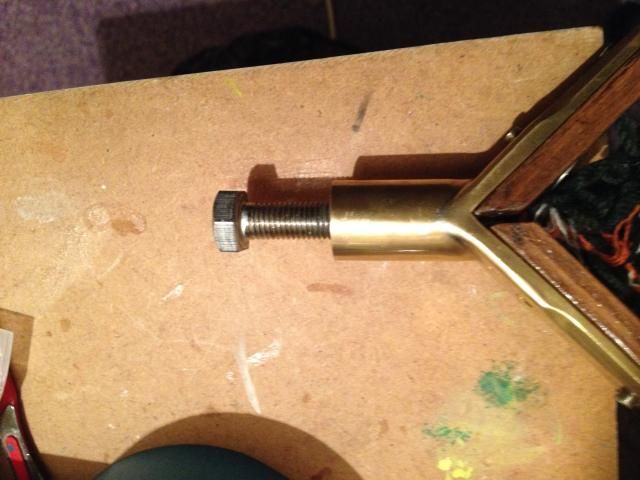
well another little update (things would be a lot quicker if I didn't only work on it at weekends,but that's all I have) ,after getting the wrong taps ,I was going to order the right one (3/8 bsf ,20tpi) but then it occurred to me I already have one ,i'd brought one a couple of years ago it came with the corresponding die which I needed for a adaptor I made (I had a go at making a rod rest adaptor thingy) so I duly hunter high & low for my tap & die set .I managed to find it eventually (hidden in plain sight) .
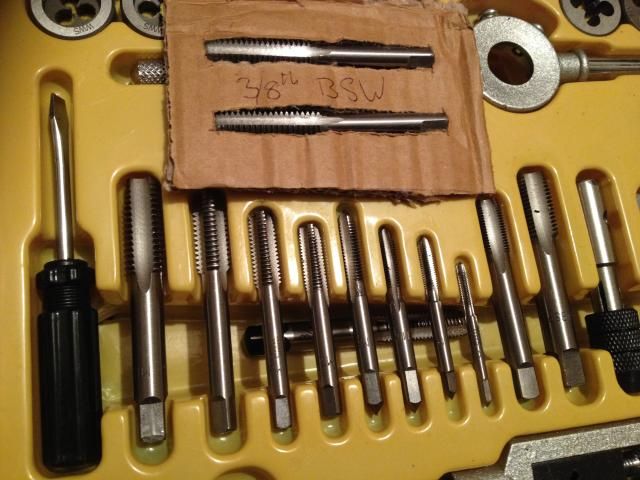
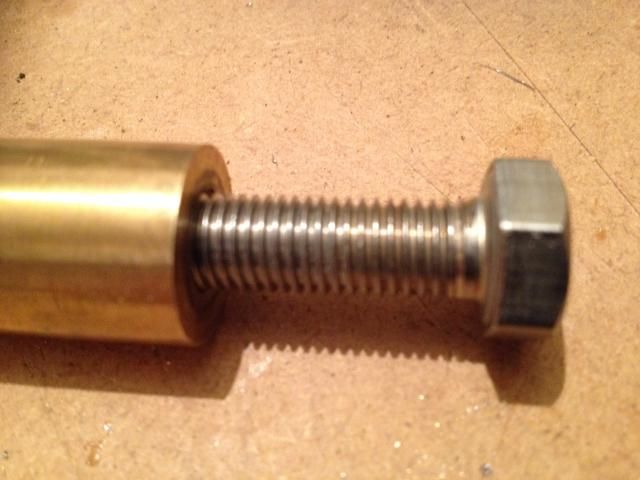
I compared it with the equivalent bsw tap i'd brought
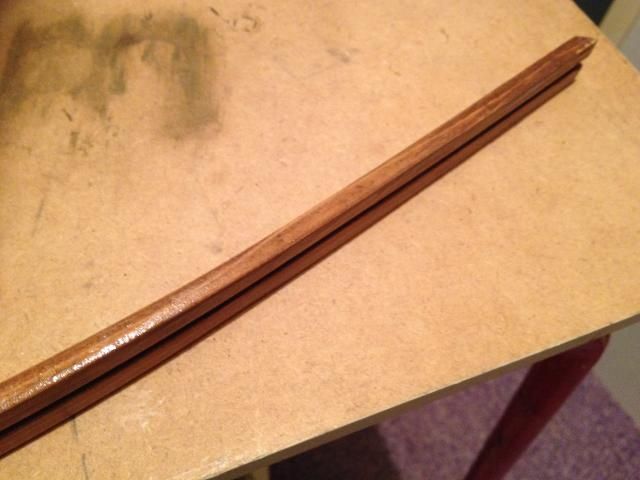
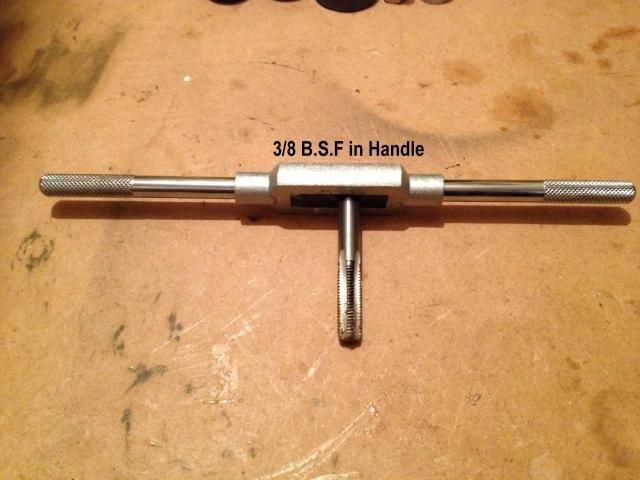
got my 3/8ths tap in the holder/wench & had the threads in the net head & handle end re-cut
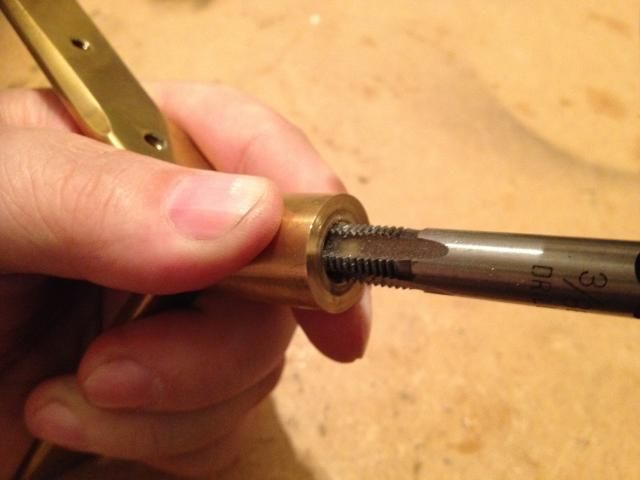

i'd been using the threaded end of a quick change connector to test the threads

now all was perfect ,now all I had too do was remove a threaded bolt from a old set of rod balance weights
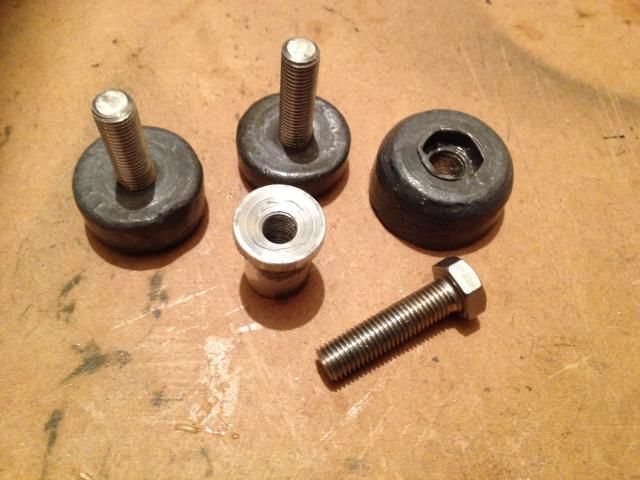
all though once screwed in good and tight it would be ok
I didn't want to take the chance of it coming loose ,so I decided to use araldite to fix it in place permanently ,I had just about enough left ,& squeezed the last dregs out of the tubes mixed it up and spread onto the bolts threads

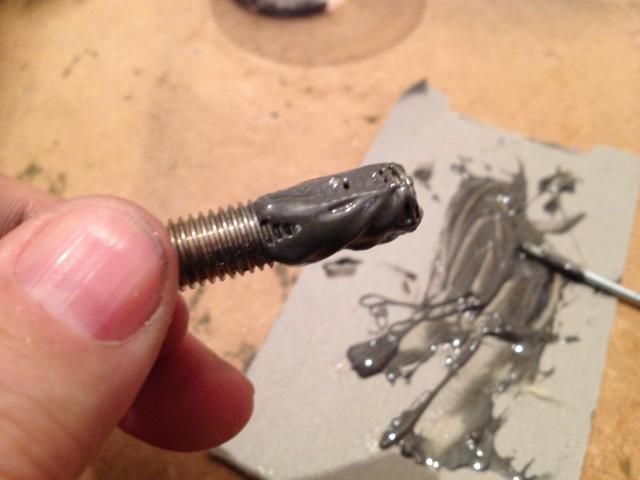
screwed it in tight and cleaned off the excess
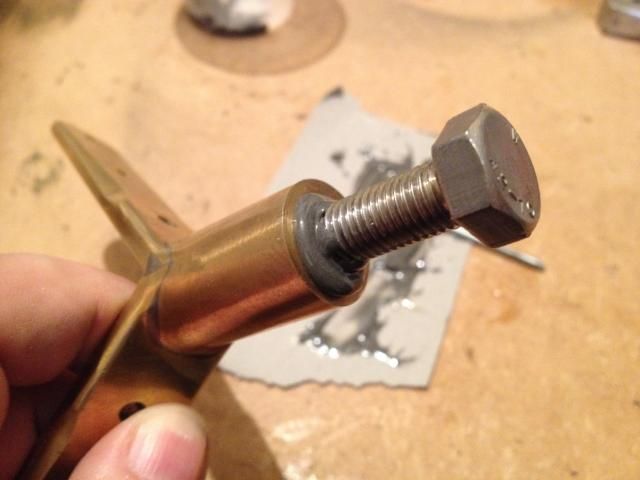
just have too leave now to fully cure ,before cutting down to length required
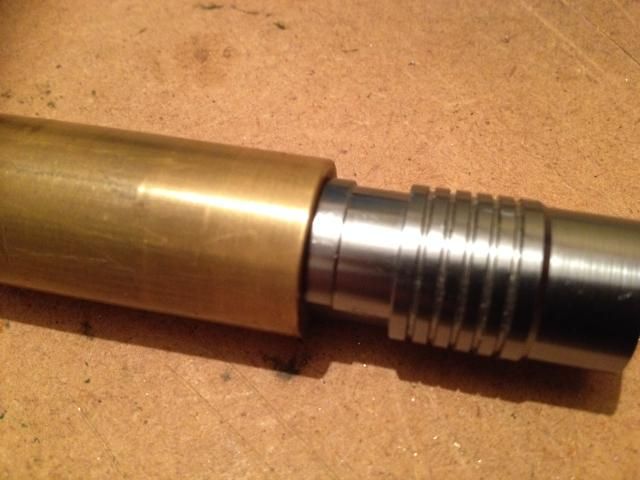
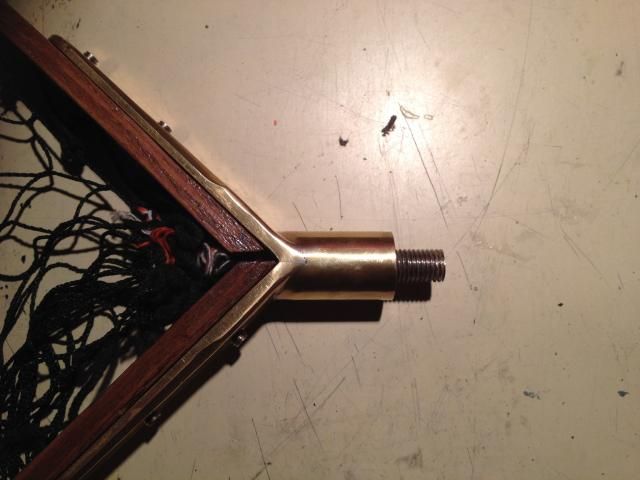
with the net head virtually done it was time for a test fit too the frame
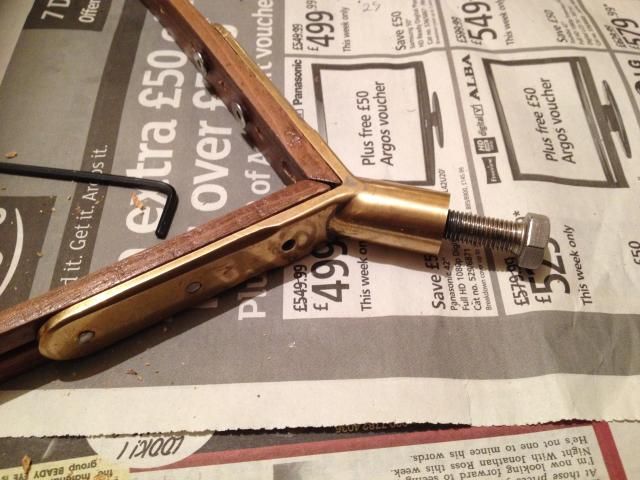
because this was a brought secondhand (could of been new I guess) net head and not one designed for the frame there was a disparity in the fit because of the " V " angle ,I had to shave a bit of the end of the frame and force it too fit the head ,I held it in place by lightly screwing in the retaining screws .it looked good
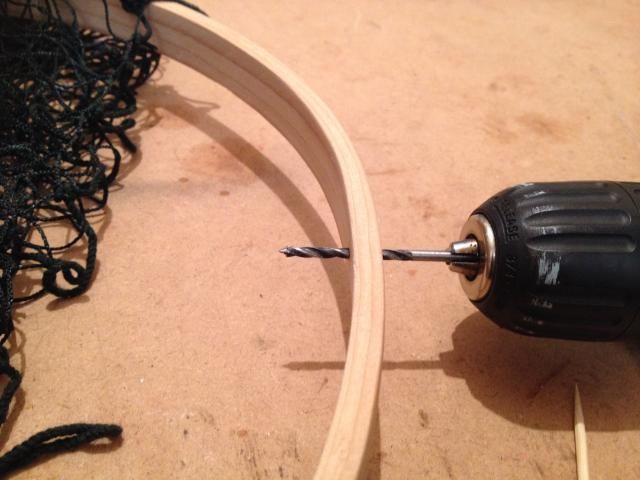
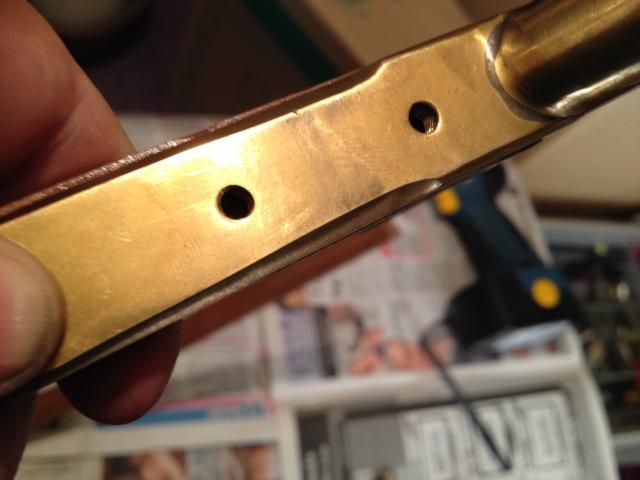
while fitted I marked out the spacing for the nets loops holes and the net heads retaining screw recesses
I checked the spacing for fit by lacing the net through
I've stripped the head back off ,as I need to touch up the frame where I've drilled with dye then give it another clear coat before final assembly and net fitting when the lashing twine arrives.soon be finished and ready for next season.
a little extra bonus
well after sorting the threads ,I have a external handle threaded ,and In with the rod balance weights was a threaded internal cap (used for the weights or a button) ideal for a net handle .so now I have two threaded ends for making landing net handles with in the future .
and I still have two more 3/8 bsf bolts from the other weights & the leftover metric stub bolt
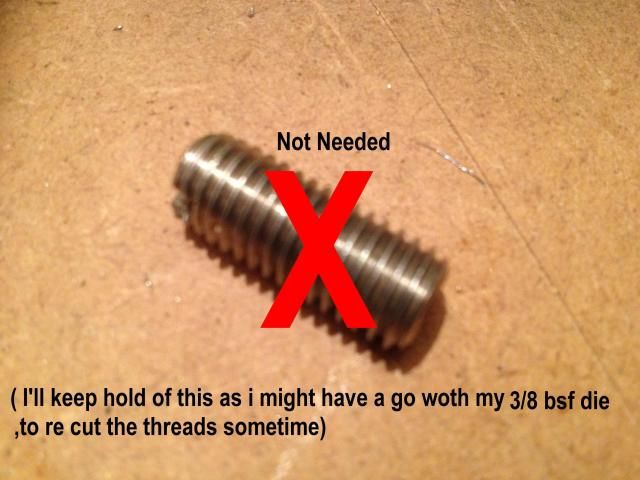
I could re-use after re-threading it with my 3/8 bsf die some time for another project in the future .
I compared it with the equivalent bsw tap i'd brought
got my 3/8ths tap in the holder/wench & had the threads in the net head & handle end re-cut
i'd been using the threaded end of a quick change connector to test the threads
now all was perfect ,now all I had too do was remove a threaded bolt from a old set of rod balance weights
all though once screwed in good and tight it would be ok
I didn't want to take the chance of it coming loose ,so I decided to use araldite to fix it in place permanently ,I had just about enough left ,& squeezed the last dregs out of the tubes mixed it up and spread onto the bolts threads
screwed it in tight and cleaned off the excess
just have too leave now to fully cure ,before cutting down to length required
with the net head virtually done it was time for a test fit too the frame
because this was a brought secondhand (could of been new I guess) net head and not one designed for the frame there was a disparity in the fit because of the " V " angle ,I had to shave a bit of the end of the frame and force it too fit the head ,I held it in place by lightly screwing in the retaining screws .it looked good
while fitted I marked out the spacing for the nets loops holes and the net heads retaining screw recesses
I checked the spacing for fit by lacing the net through
I've stripped the head back off ,as I need to touch up the frame where I've drilled with dye then give it another clear coat before final assembly and net fitting when the lashing twine arrives.soon be finished and ready for next season.
a little extra bonus
well after sorting the threads ,I have a external handle threaded ,and In with the rod balance weights was a threaded internal cap (used for the weights or a button) ideal for a net handle .so now I have two threaded ends for making landing net handles with in the future .
and I still have two more 3/8 bsf bolts from the other weights & the leftover metric stub bolt
I could re-use after re-threading it with my 3/8 bsf die some time for another project in the future .
I try to be funny... but sometimes I merely look it! Steve
-
Chavender
- Eel
- Posts: 2245
- Joined: Tue Jan 03, 2012 11:49 am
- 12
- Location: Ilkeston, Derbyshire
- Contact:
Re: my next landing net project
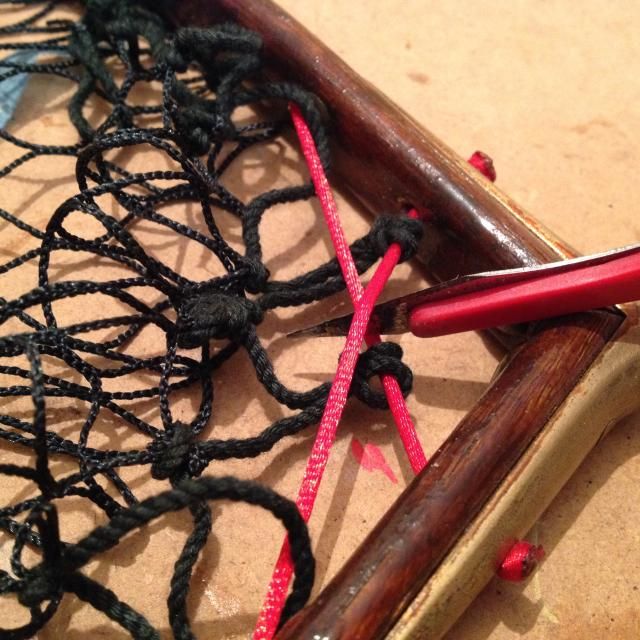
my net frame where it comes to a V is a different angle to that of spreader .and I didn't want to try and bend the spreader arms inwards as it has soldered joints and I might of damaged it (might never find another) so I had to put some pressure on the frame to get it too fit too the spreader .it left a gap on one side but not the other .after fitting it I trimmed the bolt too size using my dremel & cutting disc
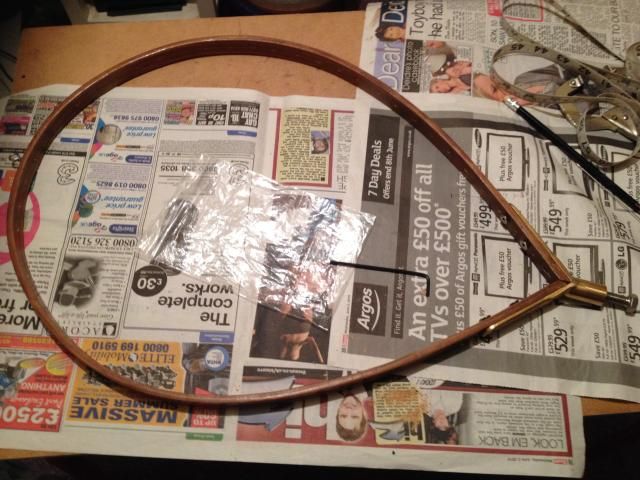
My new lashing cord had arrived (well three of them ,as I couldn't decide which one to get so got all three) its 12 ply bakers twine and really cheap for 5m and comes in loads of colours from solid ,twist & metallic
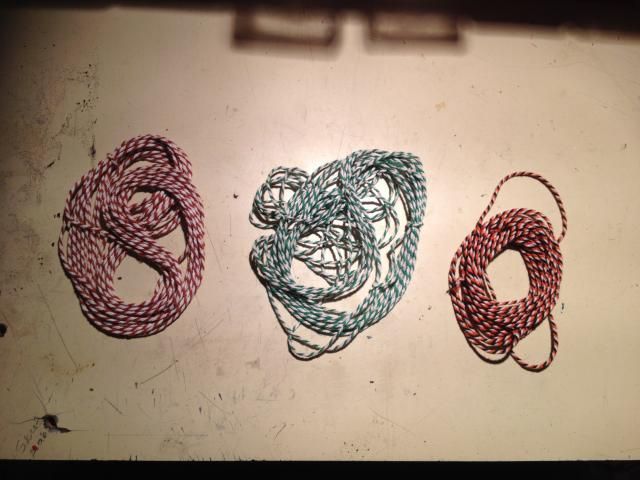
just had to choose one of the cords
green twist
brown twist
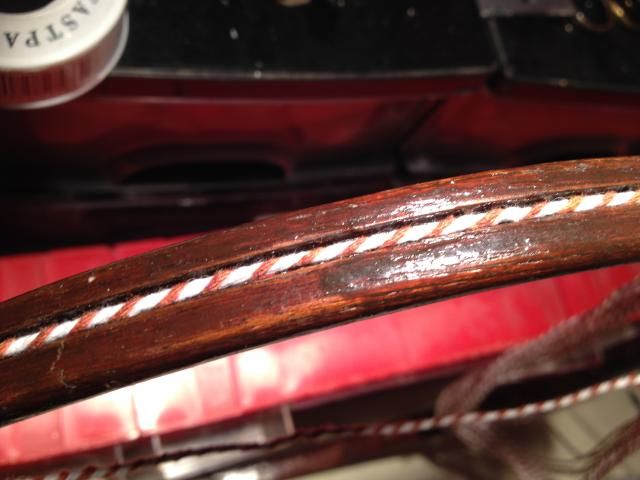
multi twist
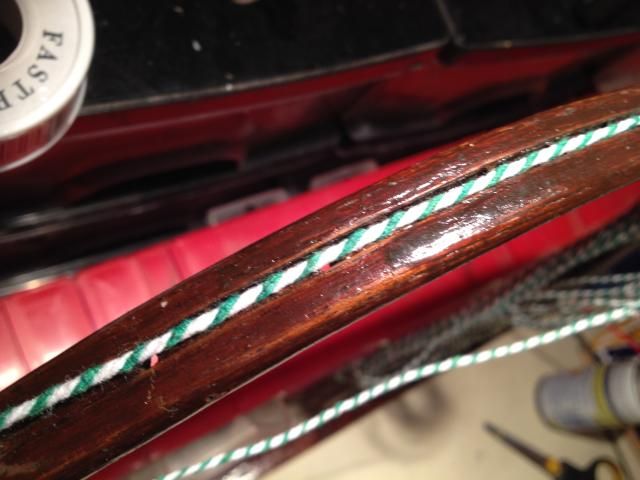
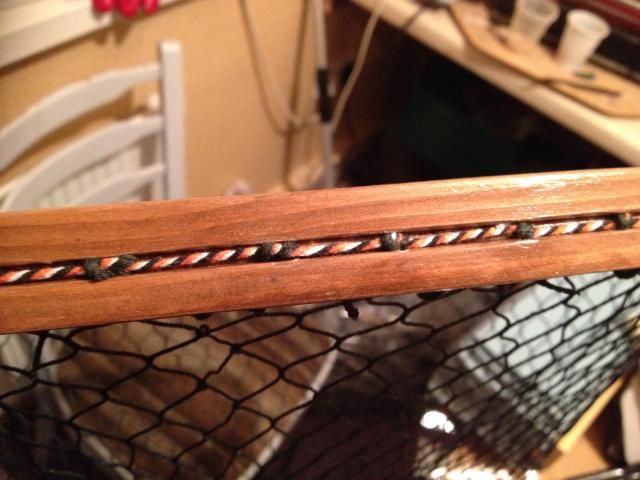
well I plumbed for the multi twist ,as it'd stand out better against the frame ,the green twist i'll use on my vintage small crabtree net it'll contrast better with its dark frame ,the brown twist will be spare .I set about pulling the nets loops through the frame .the net had about 6 loops I had no holes for so had to try and tie them in at the V when I string up the lashing cord.
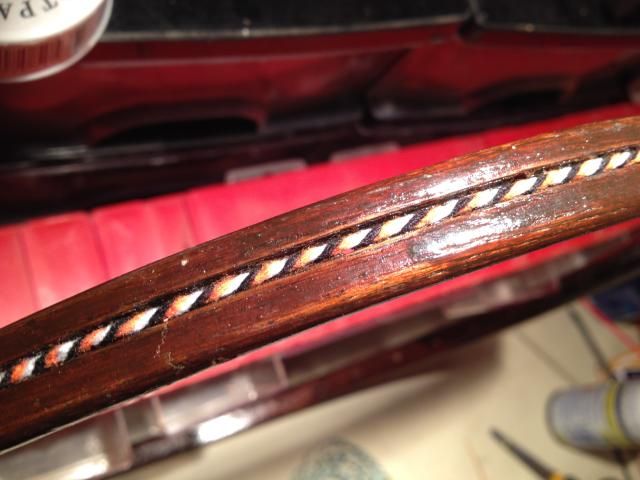
then I threaded the lashing cord through the frame and along the groove ,passing it twice through each net loop .then I threaded the loose loops in at the V ,a bit untidy but with hindsight i should of spaced the loops ¾" apart ,instead of 1" apart .but its ok ,I can live with it how it is .I pulled everything down & tight then tied it off
Its turned out ok ,not perfect but the spreader and frame was a little miss matched but It's what I had too work with so it'll do for me .Its took a while too do ,only working on it at weekends and waiting 18 months or so to find a spreader but Im pleased with how it looks and it looks good on both my net handles and will serve me well.

My new lashing cord had arrived (well three of them ,as I couldn't decide which one to get so got all three) its 12 ply bakers twine and really cheap for 5m and comes in loads of colours from solid ,twist & metallic
just had to choose one of the cords
green twist
brown twist
multi twist
well I plumbed for the multi twist ,as it'd stand out better against the frame ,the green twist i'll use on my vintage small crabtree net it'll contrast better with its dark frame ,the brown twist will be spare .I set about pulling the nets loops through the frame .the net had about 6 loops I had no holes for so had to try and tie them in at the V when I string up the lashing cord.
then I threaded the lashing cord through the frame and along the groove ,passing it twice through each net loop .then I threaded the loose loops in at the V ,a bit untidy but with hindsight i should of spaced the loops ¾" apart ,instead of 1" apart .but its ok ,I can live with it how it is .I pulled everything down & tight then tied it off
Its turned out ok ,not perfect but the spreader and frame was a little miss matched but It's what I had too work with so it'll do for me .Its took a while too do ,only working on it at weekends and waiting 18 months or so to find a spreader but Im pleased with how it looks and it looks good on both my net handles and will serve me well.
Last edited by Chavender on Sun Mar 08, 2015 9:18 pm, edited 1 time in total.
I try to be funny... but sometimes I merely look it! Steve
-
Mark

- Head Bailiff
- Posts: 21217
- Joined: Mon Aug 22, 2011 4:55 pm
- 12
- Location: Leicestershire
- Contact:
Re: my next landing net project
Well done Steve, very nice indeed.
Mark (Administrator)
The most precious places in the English landscape are those secretive corners,
where you find only elder trees, nettles and dreams. (BB - Denys Watkins-Pitchford).
The most precious places in the English landscape are those secretive corners,
where you find only elder trees, nettles and dreams. (BB - Denys Watkins-Pitchford).
-
SkimmingTheCream

- Chub
- Posts: 1132
- Joined: Sat Apr 27, 2013 8:21 pm
- 11
- Location: Sheffield
Re: my next landing net project
Well done 
-
Loop Erimder

- Wild Carp
- Posts: 9984
- Joined: Wed Apr 04, 2012 11:33 pm
- 12
- Location: Leicestershire
Re: my next landing net project
That is fantastic. I will get round to making one myself one day lm needing one in between the sizes I have already
Chance is always powerful. Let your hook be always cast; in the pool where you least expect it, there will be a fish