Wonderful work again wm+ - I'm happy to wait however long it takes to see your 'in progress' photos. I'll miss them whrn you finish the lathe. But perhaps you will enrich us with another amazing project. Sorry to hear of your health problems,I hope you are well now, and remain so for a very long time.
After a long time, I finally got around to trying out those balsa drilling jigs - as expected they are outstanding.
Making a float-making lathe.
-
GarryProcter

- Arctic Char
- Posts: 1897
- Joined: Sun Apr 29, 2012 12:48 pm
- 11
- Location: Wilt Shire
-
Estaban
Re: Making a lathe..for making floats!
Another excellent installment WM+ Sir, hope you are feeling back up to snuff.
-
Watermole+

- Chub
- Posts: 1050
- Joined: Thu Mar 15, 2012 11:07 pm
- 12
- Location: Devon & Cornwall border
Re: Making a lathe..for making floats!
Part 11. Let's start this again!
..It's been a bit of a trial this week. Apart from having almost no time for hobbies etc. This project has shown up some very glaring faults .As things have progressed, it has become more and more apparent that there are certain basic design flaws in both the general layout and also the 'Z' axis movement, which no modifications could ever put right. It could be made to work, but only in a limited way and since there's no point in continuing with something which is never going to work satisfactory anyway, the best thing is to start again..from the beginning.
I'm not going to throw away everything, just the wooden base plate and some of the smaller parts. The base was always too narrow, I put some holes in the wrong places and made it unnecessarily long to start with. A pity really because it was a nicely figured grain on that bit of beech.
..So then..here we go again!
The wood chose from available stock, was a piece of 3/4" thick oak, a scrap off-cut taken from an old plank. I first cut this to length and to a width of 4 1/2" (it was only just wide enough!) and after removing the paint, scraped it flat. The edges were then chamfered in much the same manner as baseplate Mk.1 (now in bin).
One of the things I would like to now include is to mount the base on a box frame, which will incorporate space for the switch/speed adjuster and a small drawer for the little accessories & tools. I don't have a lot of carpentry experience-apart from making chicken houses and a rabbit hutch) so thought we might rebate (is that the term?) the edges of the base to support strip wood sides. I did this by clamping guide blocks to the pillar drill table and pushing the base plate past the cutter, like this..
It looks-and is-a bit dangerous to do -but we got there. I cut the ends the safer way-by hand with a tenon saw, -like this..
The next problem was with the motor. During a test run, it developed a horrible rattle. I stopped it at once and on dis-assembly, discovered that one of the stator plates had come loose and was vibrating against the sides. At least there was no damage so after cleaning, I re-assembled it, doing the screws up with a spot of 'Loctite', which should prevent any recurrence of that. It runs very smoothly now so problem solved.
Now we come to the 'Z' axis and this is where the design fell flat.
These carefully made parts were going to be the intended way of moving the toolholder along.
..and assembled-
..But this would not really give the desirable level of control I would like, so these parts will now go on the other end for fine adjustment and this end controlled by a geared thumbwheel. I decided to use the brass off-cut left over from making the toolholder block, as a little 'gearbox' and spent a lot of precious time machining this up in the lathe 4-jaw chuck, together with making the brass gear wheels..
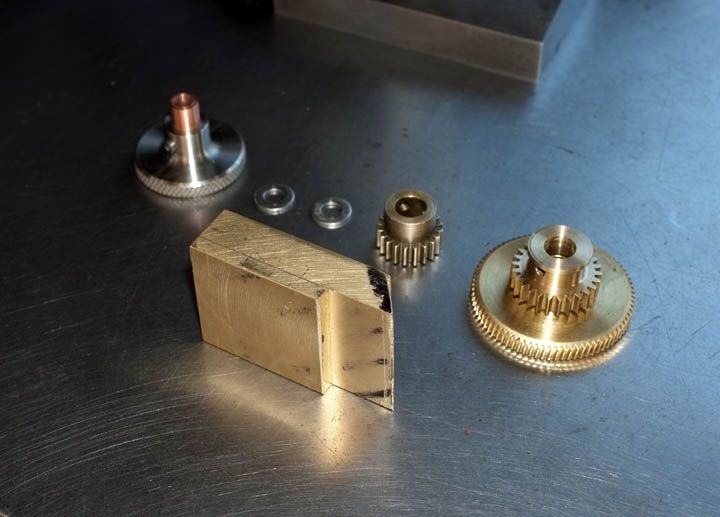
..then realized that I had made some classic mathematical & machining errors so most of this is now scrap!!!
Nothing for it but to cut up a bit more brass and start again..

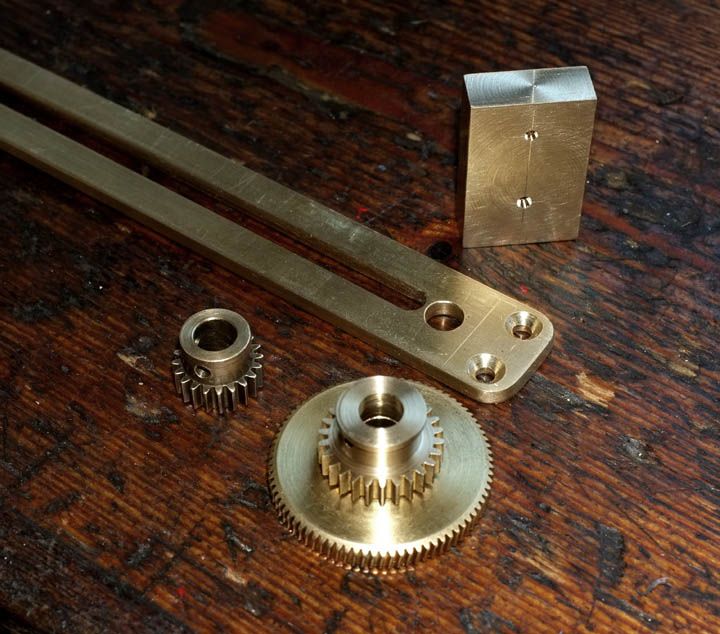
This was worked out correctly this time and here you see the gearbox partly made, together with the new gears..
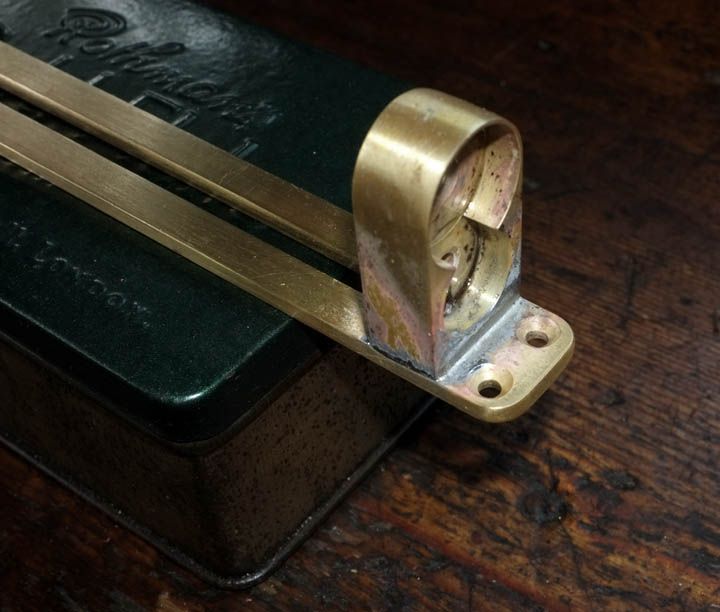
The next step is to radius off the top of the box with files..
..before finishing off with emery strip. The box will be soldered in position when finished. In case you are wondering how the gear wheels were made, I firstly cut the slots out by broaching on the lathe, rather in the same manner as making the check wheel for the TFF Aerial, then finished the teeth angles by hand with needle files like this..
..which took a long time so as you may imagine, I was not best pleased at having to do this again!
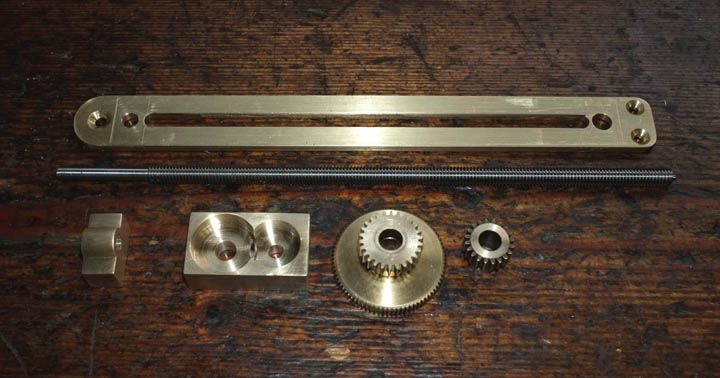
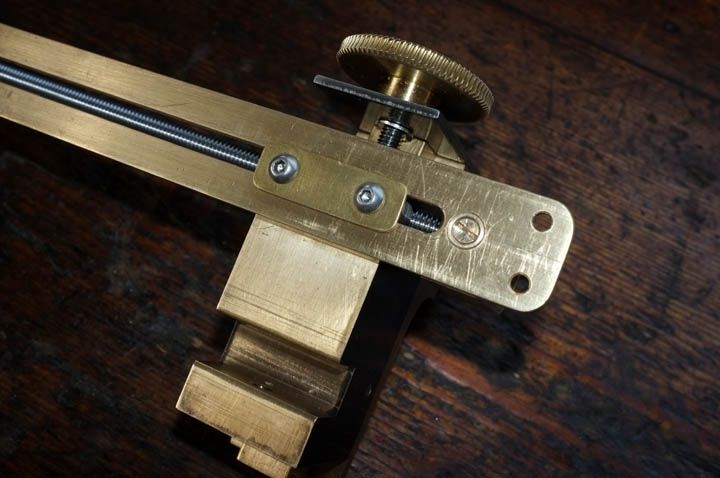
Anyway, we got there eventually and here you see a trial fitting to make sure everything moves as it should do.
This shows the underside..(Ignore all the scratches, they will be polished out before it finally goes together).
Next, the gearbox was soldered on.
It was then cleaned up and degreased. Then we made the little shaft which holds the thumbwheel from a scrap of stainless..

This is the gearbox assembled..
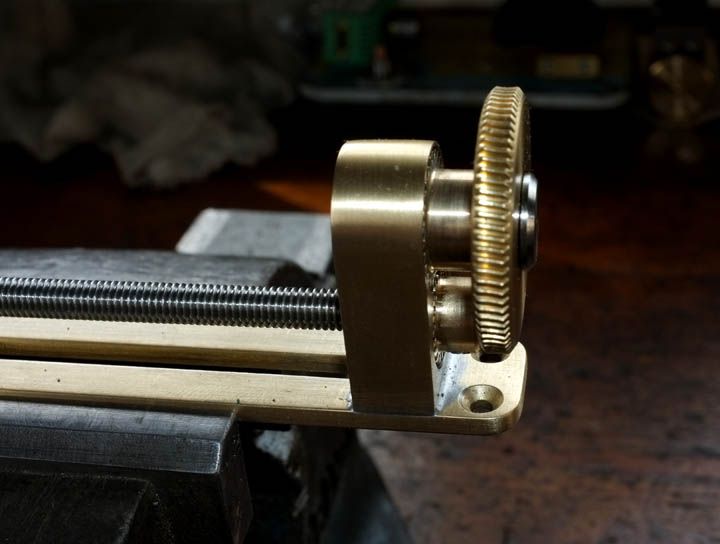
I have since shortened the head of the shaft and still need to make little handles for the thumbwheels, but that will have to wait until next time, when hopefully, it ought to start to go together a bit better..
Best wishes for now,
wm+
..It's been a bit of a trial this week. Apart from having almost no time for hobbies etc. This project has shown up some very glaring faults .As things have progressed, it has become more and more apparent that there are certain basic design flaws in both the general layout and also the 'Z' axis movement, which no modifications could ever put right. It could be made to work, but only in a limited way and since there's no point in continuing with something which is never going to work satisfactory anyway, the best thing is to start again..from the beginning.
I'm not going to throw away everything, just the wooden base plate and some of the smaller parts. The base was always too narrow, I put some holes in the wrong places and made it unnecessarily long to start with. A pity really because it was a nicely figured grain on that bit of beech.
..So then..here we go again!
The wood chose from available stock, was a piece of 3/4" thick oak, a scrap off-cut taken from an old plank. I first cut this to length and to a width of 4 1/2" (it was only just wide enough!) and after removing the paint, scraped it flat. The edges were then chamfered in much the same manner as baseplate Mk.1 (now in bin).
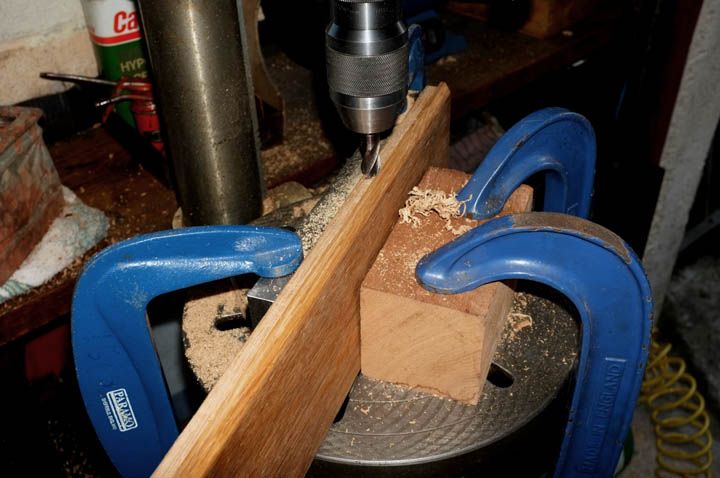
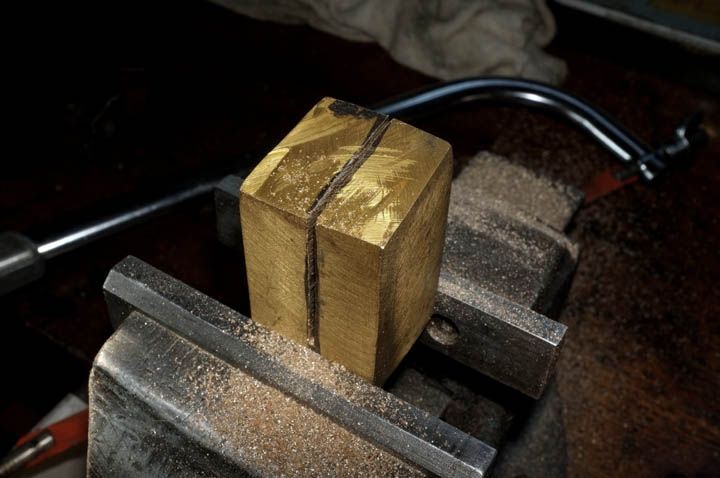
One of the things I would like to now include is to mount the base on a box frame, which will incorporate space for the switch/speed adjuster and a small drawer for the little accessories & tools. I don't have a lot of carpentry experience-apart from making chicken houses and a rabbit hutch) so thought we might rebate (is that the term?) the edges of the base to support strip wood sides. I did this by clamping guide blocks to the pillar drill table and pushing the base plate past the cutter, like this..
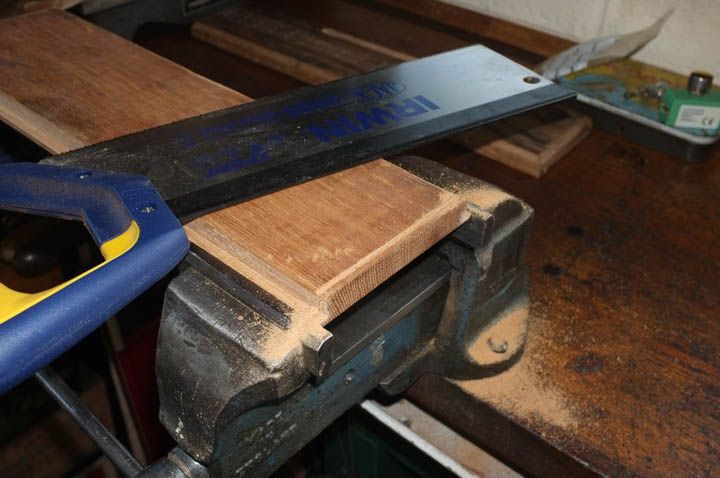
It looks-and is-a bit dangerous to do -but we got there. I cut the ends the safer way-by hand with a tenon saw, -like this..
The next problem was with the motor. During a test run, it developed a horrible rattle. I stopped it at once and on dis-assembly, discovered that one of the stator plates had come loose and was vibrating against the sides. At least there was no damage so after cleaning, I re-assembled it, doing the screws up with a spot of 'Loctite', which should prevent any recurrence of that. It runs very smoothly now so problem solved.
Now we come to the 'Z' axis and this is where the design fell flat.
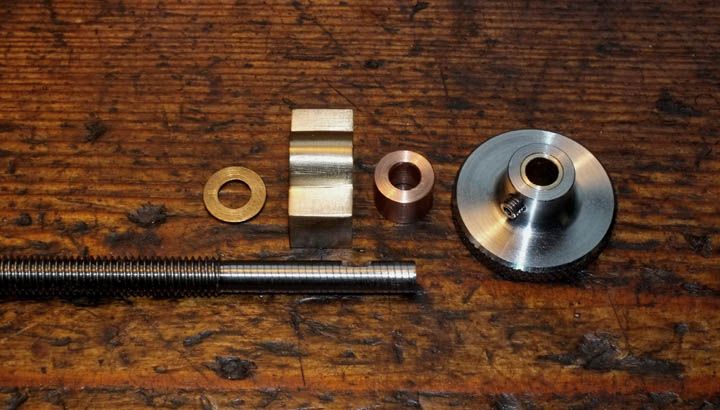
These carefully made parts were going to be the intended way of moving the toolholder along.
..and assembled-
..But this would not really give the desirable level of control I would like, so these parts will now go on the other end for fine adjustment and this end controlled by a geared thumbwheel. I decided to use the brass off-cut left over from making the toolholder block, as a little 'gearbox' and spent a lot of precious time machining this up in the lathe 4-jaw chuck, together with making the brass gear wheels..
..then realized that I had made some classic mathematical & machining errors so most of this is now scrap!!!
Nothing for it but to cut up a bit more brass and start again..
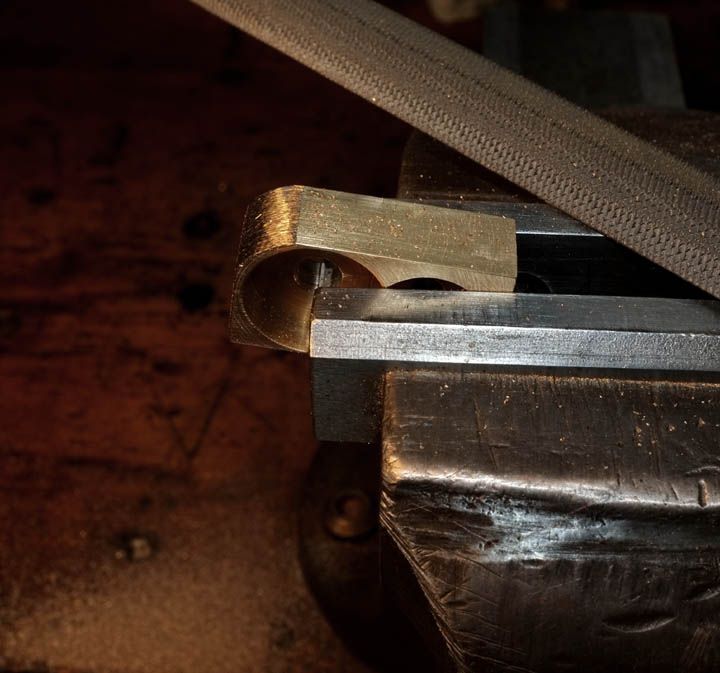
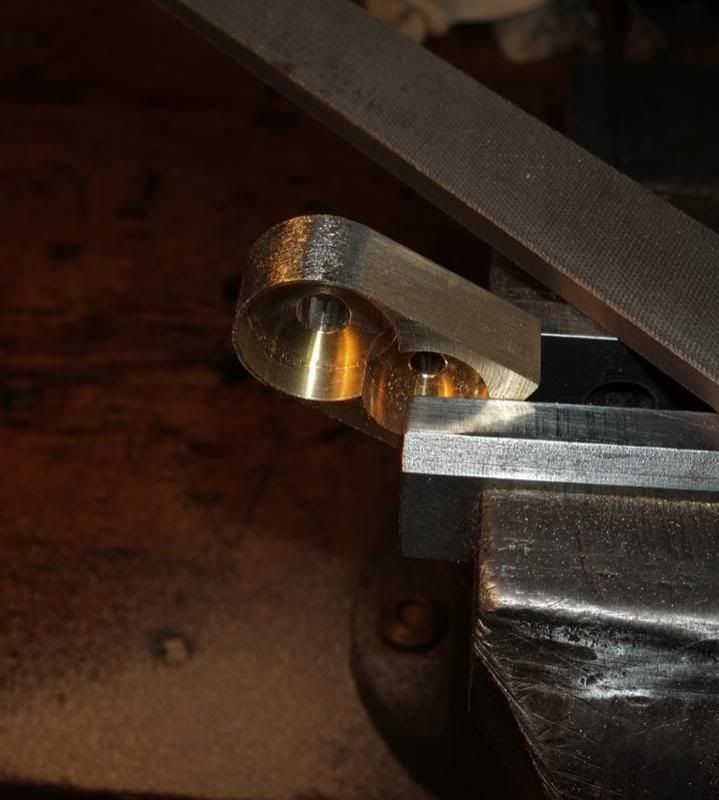
This was worked out correctly this time and here you see the gearbox partly made, together with the new gears..
The next step is to radius off the top of the box with files..
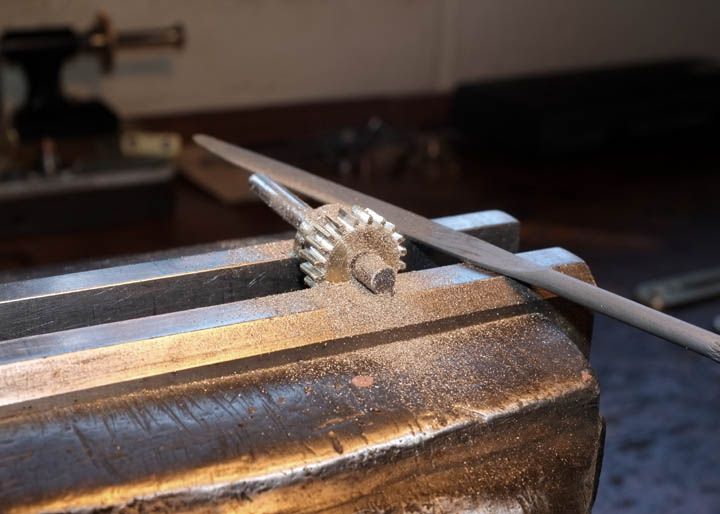
..before finishing off with emery strip. The box will be soldered in position when finished. In case you are wondering how the gear wheels were made, I firstly cut the slots out by broaching on the lathe, rather in the same manner as making the check wheel for the TFF Aerial, then finished the teeth angles by hand with needle files like this..
..which took a long time so as you may imagine, I was not best pleased at having to do this again!
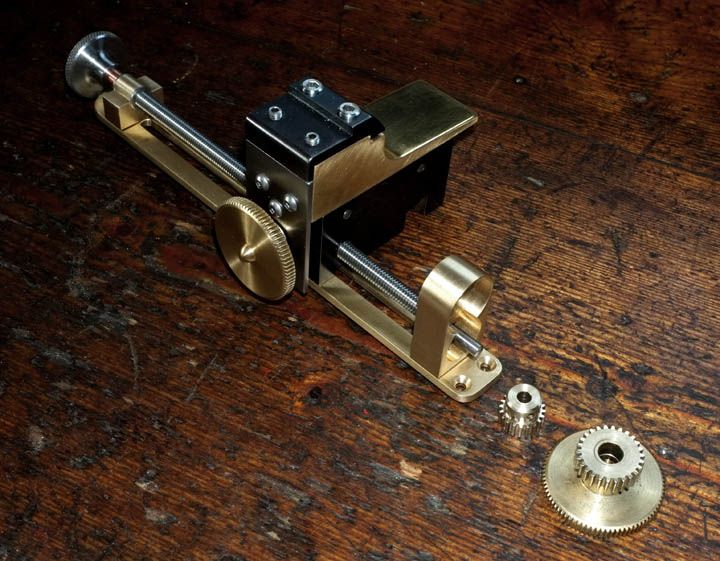
Anyway, we got there eventually and here you see a trial fitting to make sure everything moves as it should do.
This shows the underside..(Ignore all the scratches, they will be polished out before it finally goes together).
Next, the gearbox was soldered on.
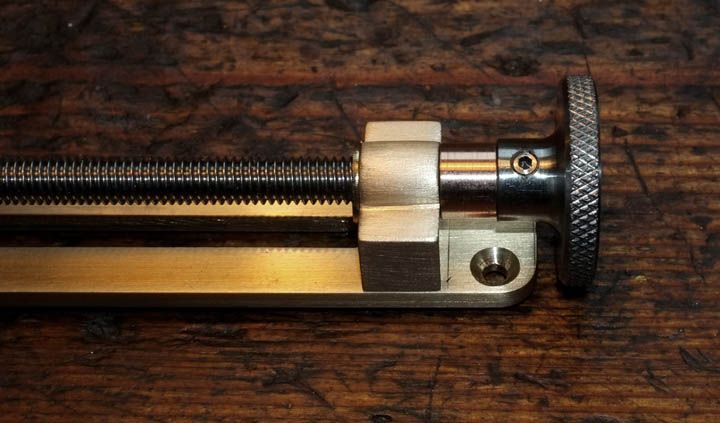
It was then cleaned up and degreased. Then we made the little shaft which holds the thumbwheel from a scrap of stainless..
This is the gearbox assembled..
I have since shortened the head of the shaft and still need to make little handles for the thumbwheels, but that will have to wait until next time, when hopefully, it ought to start to go together a bit better..
Best wishes for now,
wm+
"Are not two sparrows sold for a farthing? Yet one of them shall not fall without your Father knoweth" ..Jesus of Nazareth, King James AV
-
Estaban
Re: Making a lathe..for making floats!
The gearbox is beautiful WM+, your perseverance has paid off well, I cannot imagine what it must have been to make the first batch of parts only to realize that they had to be made over. My hat is off to you yet again Sir, you are a craftsman if the highest order.
-
Mark

- Head Bailiff
- Posts: 21167
- Joined: Mon Aug 22, 2011 4:55 pm
- 12
- Location: Leicestershire
- Contact:
Re: Making a lathe..for making floats!
Another great post wm+, yet again outstanding work.
Mark (Administrator)
The most precious places in the English landscape are those secretive corners,
where you find only elder trees, nettles and dreams. (BB - Denys Watkins-Pitchford).
The most precious places in the English landscape are those secretive corners,
where you find only elder trees, nettles and dreams. (BB - Denys Watkins-Pitchford).
-
Snape

- Bailiff
- Posts: 9983
- Joined: Sun Sep 04, 2011 11:52 am
- 12
- Location: North Oxfordshire
- Contact:
Re: Making a lathe..for making floats!
Amazing. I can't wait to see the end product. 
“Fishing is much more than fish. It is the great occasion when we may return to the fine simplicity of our forefathers,” Herbert Hoover.
`·.¸¸.·´¯`·.¸¸.·´¯`·.¸ ><((((º>
`·.¸¸.·´¯`·.¸¸.·´¯`·.¸ ><((((º>
-
Marc

- Sea Trout
- Posts: 4006
- Joined: Sun Mar 10, 2013 11:14 am
- 11
- Location: Co Durham, land of the prince bishops
Re: Making a lathe..for making floats!
Great Odins raven!  . Is there no end to your talents. Top notch work as ever.
Marc. (Prince of Durham)
“A life that partakes even a little of friendship, love, irony, humor, parenthood, literature, and music, and the chance to take part in battles for the liberation of others cannot be called 'meaningless'...”
“A life that partakes even a little of friendship, love, irony, humor, parenthood, literature, and music, and the chance to take part in battles for the liberation of others cannot be called 'meaningless'...”
-
Crafty Carassius
Re: Making a lathe..for making floats!
It's comforting to hear that we all learn from our mistakes and then go on to produce superior items . . .
First class workmanship as ever . . . a joy to behold!
First class workmanship as ever . . . a joy to behold!
-
Nobby

- Wild Carp
- Posts: 10983
- Joined: Sun Oct 02, 2011 2:40 pm
- 12
- Location: S.W.Surrey
- Contact:
Re: Making a lathe..for making floats!
Good grief!
He's cutting gears by hand.
I'm speechless.
He's cutting gears by hand.
I'm speechless.
-
George387

- Crucian Carp
- Posts: 849
- Joined: Wed Feb 08, 2012 10:36 pm
- 12
- Location: North Yorkshire
- Contact:
Re: Making a lathe..for making floats!
words suppress me Amazing stuff and patience of a saint by the sounds of things.
Brown Trout maybe Beautiful But Grayling are Gorgeous. "Lets Tackle Cancer" Supporter
The Flee & Float
The Flee & Float