Lovely WM+
Fantastic pictures and explanations of how and why you do things.
Making a Richard Walker Net.
-
LuckyLuca

- Barbel
- Posts: 4792
- Joined: Mon Jul 02, 2012 10:20 am
- 11
- Location: Oxfordshire
Re: Making a Richard Walker Net.
I walked across an empty land
I knew the pathway like the back of my hand
I felt the earth beneath my feet
Sat by the river and it made me complete.
I knew the pathway like the back of my hand
I felt the earth beneath my feet
Sat by the river and it made me complete.
-
GarryProcter

- Arctic Char
- Posts: 1897
- Joined: Sun Apr 29, 2012 12:48 pm
- 11
- Location: Wilt Shire
Re: Making a Richard Walker Net.
Speechless (me)
Matchless (the work)
Matchless (the work)
-
Nobby

- Wild Carp
- Posts: 10983
- Joined: Sun Oct 02, 2011 2:40 pm
- 12
- Location: S.W.Surrey
- Contact:
Re: Making a Richard Walker Net.
Yet another material into the mix..tufnol! I had no idea it was porous and could be waterproofed.
-
Barbulus

- Tench
- Posts: 2508
- Joined: Sun Aug 25, 2013 1:51 pm
- 10
Re: Making a Richard Walker Net.
Can it get any better than this ? Marvellous thread and a terrific read.
-
Snape

- Bailiff
- Posts: 9983
- Joined: Sun Sep 04, 2011 11:52 am
- 12
- Location: North Oxfordshire
- Contact:
Re: Making a Richard Walker Net.
Excellent wm+. 
“Fishing is much more than fish. It is the great occasion when we may return to the fine simplicity of our forefathers,” Herbert Hoover.
`·.¸¸.·´¯`·.¸¸.·´¯`·.¸ ><((((º>
`·.¸¸.·´¯`·.¸¸.·´¯`·.¸ ><((((º>
-
Watermole+

- Chub
- Posts: 1050
- Joined: Thu Mar 15, 2012 11:07 pm
- 12
- Location: Devon & Cornwall border
Re: Making a Richard Walker Net.
Part 6. Project complete!
...All-in-all, today was a good one.
I didn't have to go to work, so I didn't: I went fishing this morning instead..and it was another morning in Paradise..
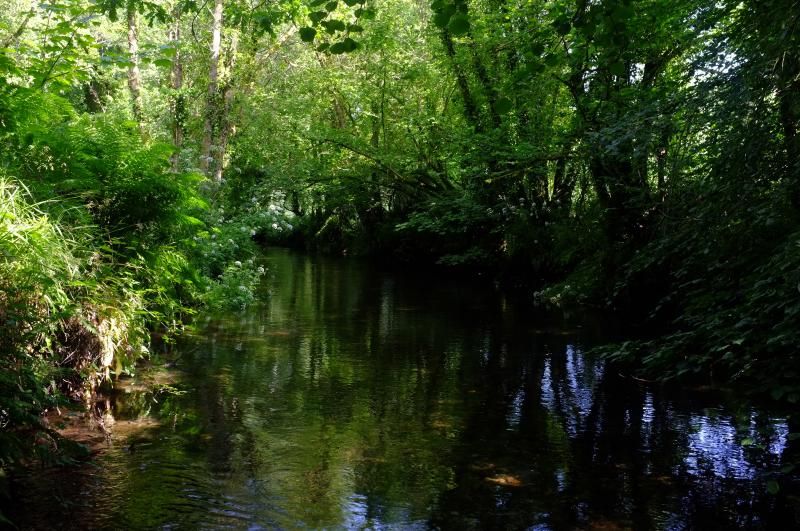
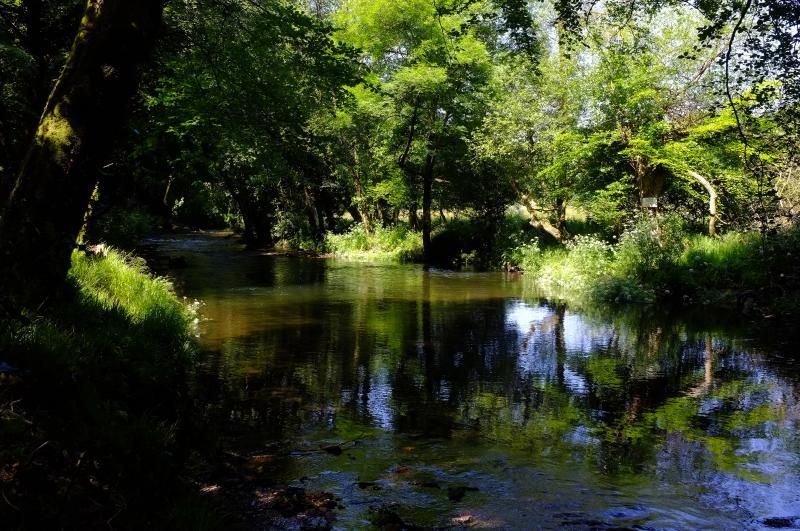
It may be 'fishing in 'Lilliput', but it really is that beautiful..
By lunchtime, the body said 'enough' so common sense & contentment prevailed...
I had hooked and landed five trout, the best one, a feisty 9" fish with attitude, which gave quite an aerobatics display before being landed and released..I didn't lose any flies to the tree gods (although there were a couple of near-misses)..saw a hobby hunting dragonflies and then met the kindly gentleman who owns the fishing adjoining the club water and after much talk of cane rods and silk lines, said that I was more than welcome to fish his water, providing I let him know first. then had a pleasant, incident free drive home to a wonderful cooked lunch!
Does it get any better..? Try this. Amongst the awaiting post, there was an official HM Customs & Revenue letter which made the heart sink at first, but on opening the same, found it to be a refund! Yes, you read rightly, a refund.. Not much, but better than the other way.. So all-in-all, it was a good day.
So I thought we could finish the net making project and show you some pictures..
Looking back to last time, we were starting to make the centre screw which holds everything together. I had turned it to 3/8" diameter and to the right length so the next step was to put on the knurled grip. To be honest, my knurling isn't up to much and rather than make half a job of it, thought I could make a good grip by broaching some semi-circular grooves along the length., like this..
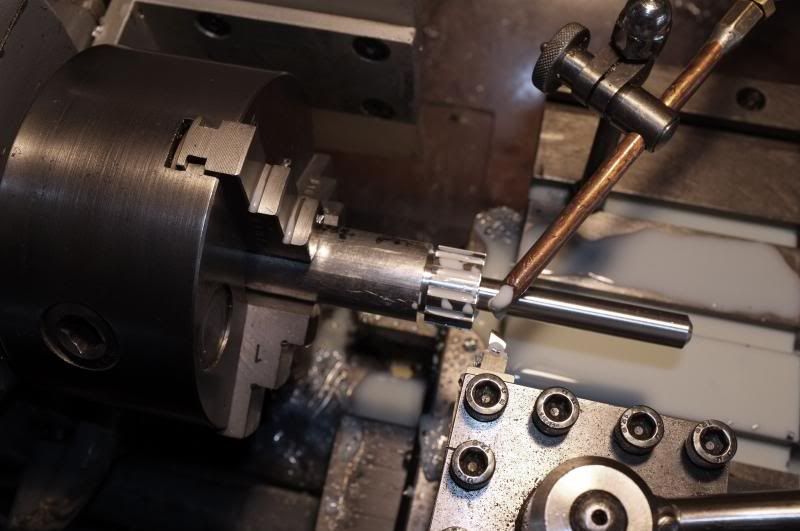
..which made a surprisingly good grip; in fact, far better than diamond knurling, so was happy about that. The next step was to put on the thread. I bought a new 3/8" BSF die but in the end, didn't use it as dies seldom cut nice threads and if they are true to the axis, it's more a matter of luck. I think split dies are more for just cleaning up threads than cutting them from plain bar.
The best way is to single-point, screw-cut threads to the effective diameter, which I did here, using a 55 degree tip tool.
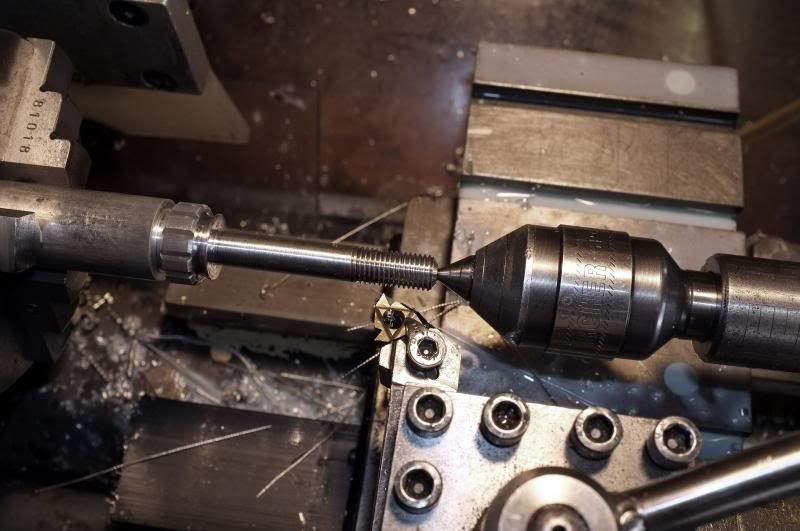
After parting off, the end was faced off and finish turned. All is now ready for building up..
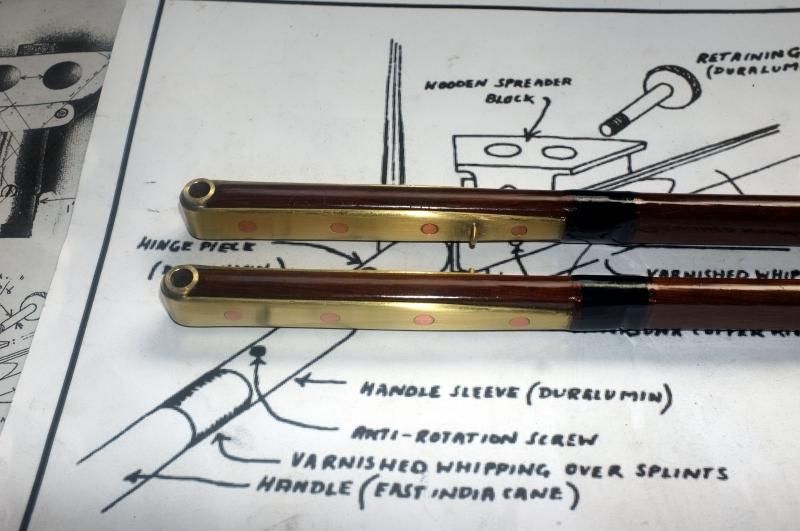
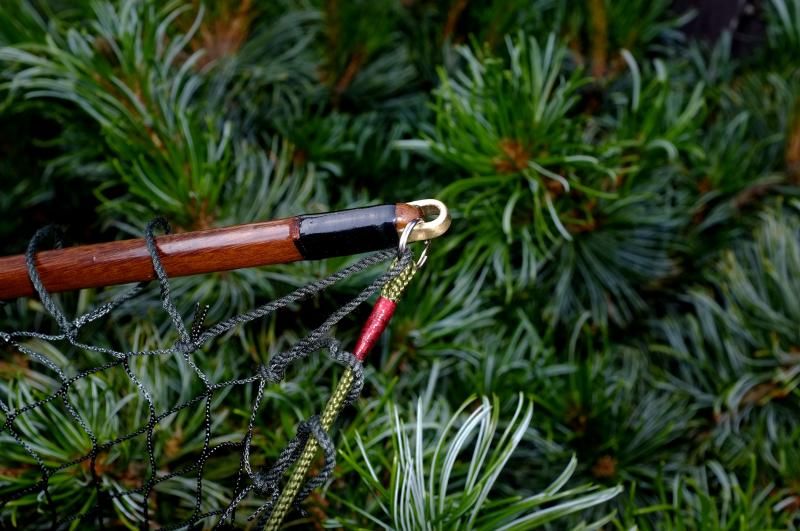
The first step was to fit the ferrule to the handle. I did this with black, 15 grade, 'Celebrated Talbot' nylon, edged with fine copper wire and varnished; likewise the ends of the brass arm straps and the ends of the arms..
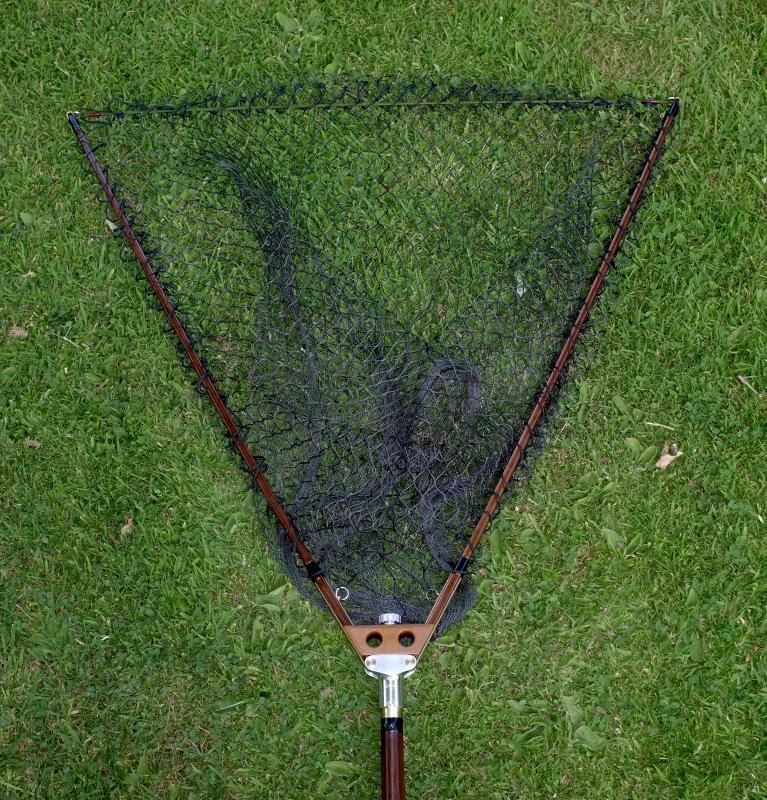
Next we fitted the net. Getting one turned out to be easier than thought. After several fruitless enquiries to many companies, the answer lay very close to home all the time. Snowbee, it seems, supply replacement soft fine mesh nets-in green-the biggest suitable for 86" circumference, round net frames. As my net has 30" arms, one of these fitted a treat! I'm not wild about the finishing of them however, so might make a better one later, but at least it allowed progress to continue. The pictures don't do the net capacity justice. It is in fact, very roomy and easily stretches out to quite big. I am sure it would accommodate a 30lb fish without too much trouble..(I should be so lucky!)
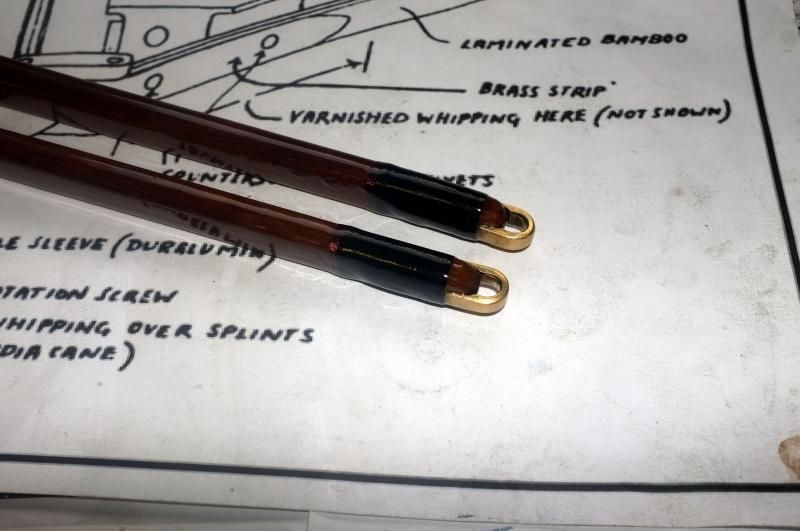
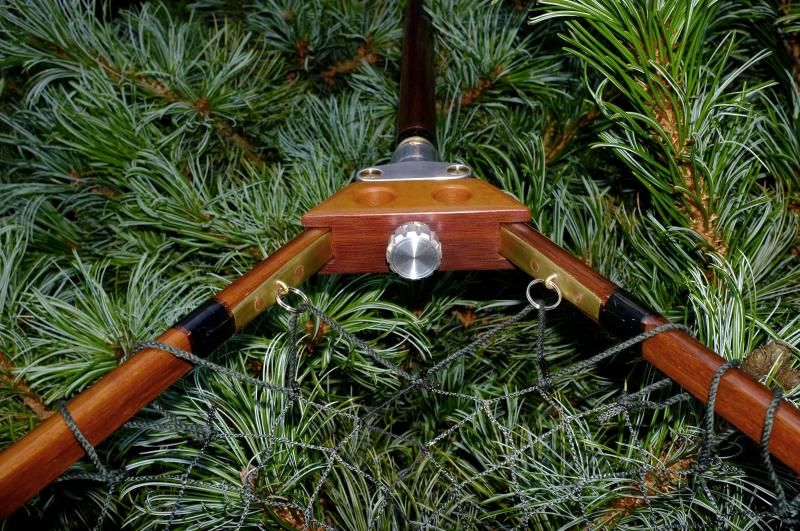
I joined the arms with green, parachute cord, which is very soft and supple, binding the loops with 6/0 thread and varnishing over. The connections are 13mm stainless split-rings (£1.10p for a packet of 10) and I used the same to attach the net to the base of the arms. Fitting little attachment loops to the brass straps made it a very easy job indeed.
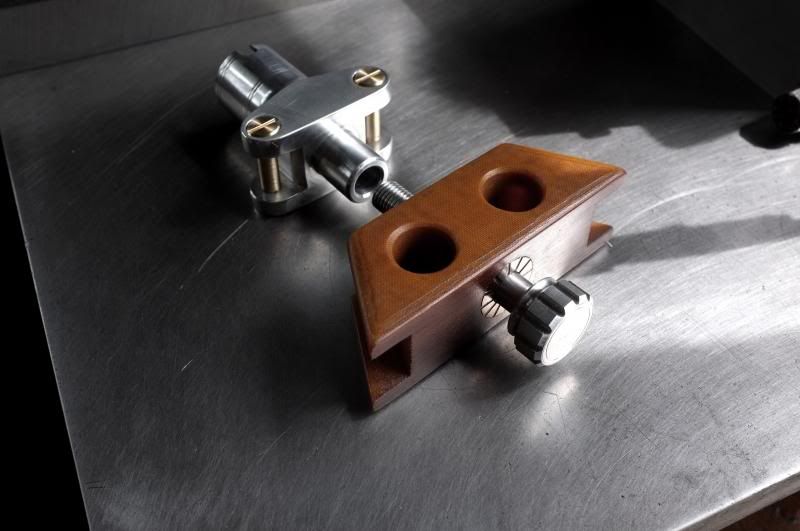
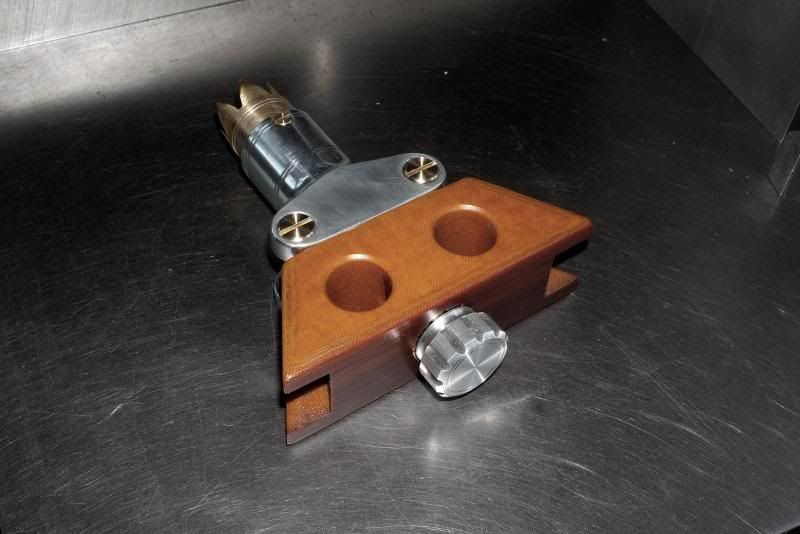
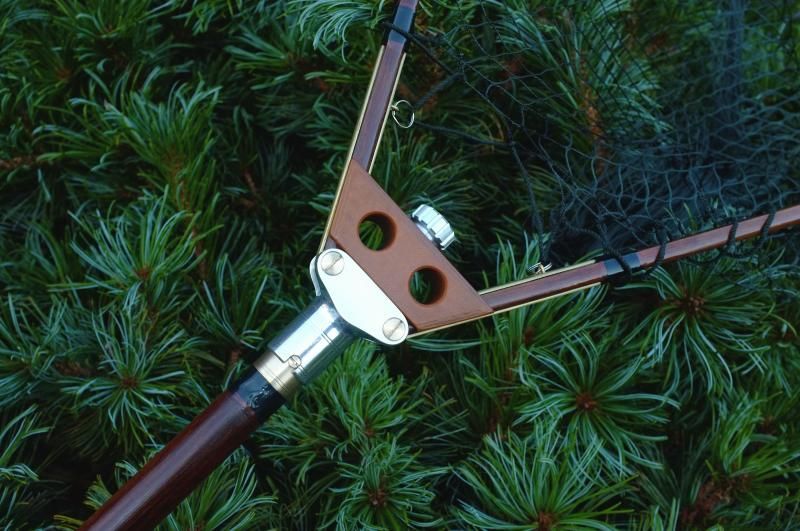
The net was assembled and that the spigot fitting inside the spreader block made it absolutely rigid! I tested it and found that there was no 'give' at all and no strain on the arms, even when lifting a considerable weight. Yes, I know it makes for extra expense in manufacture, but the difference it makes to support and overall strength is well-worth it. In fact, I think the next net could well have much reduced metal thickness because it is no longer necessary.
Anyway, here is the final product. I hope you have enjoyed the build and it will give inspiration and help to you, if you are considering having a try at making your own..why not have a go? ..You may be pleasantly surprised at what you can achieve...
The 'Water Rail' landing net. wm+ 2014
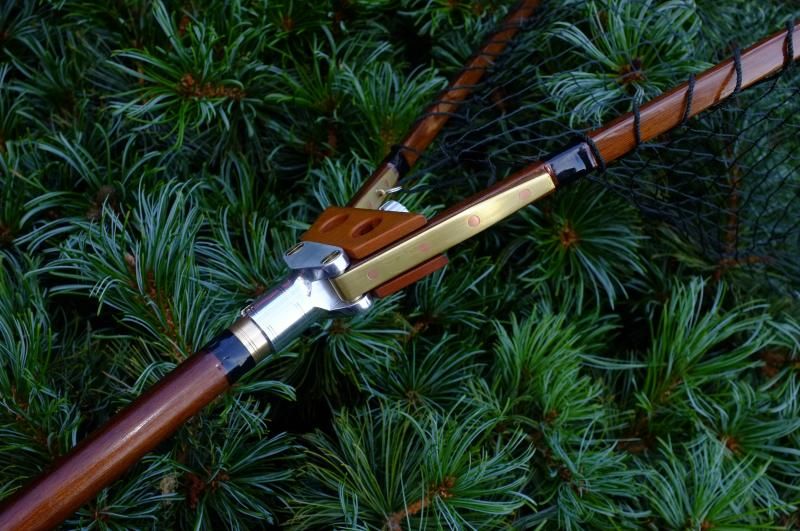
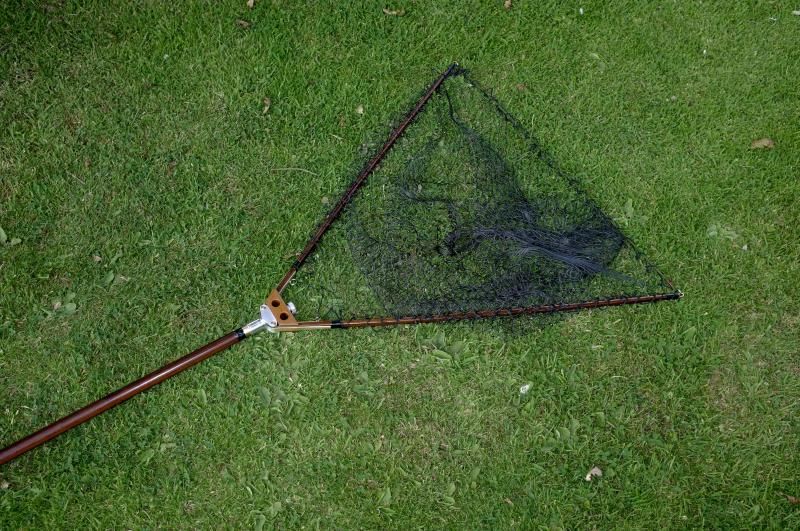
..it will look nicer with a 15lb common sitting in the bottom!
Regards to all,
wm+
...All-in-all, today was a good one.
I didn't have to go to work, so I didn't: I went fishing this morning instead..and it was another morning in Paradise..
It may be 'fishing in 'Lilliput', but it really is that beautiful..
By lunchtime, the body said 'enough' so common sense & contentment prevailed...
I had hooked and landed five trout, the best one, a feisty 9" fish with attitude, which gave quite an aerobatics display before being landed and released..I didn't lose any flies to the tree gods (although there were a couple of near-misses)..saw a hobby hunting dragonflies and then met the kindly gentleman who owns the fishing adjoining the club water and after much talk of cane rods and silk lines, said that I was more than welcome to fish his water, providing I let him know first. then had a pleasant, incident free drive home to a wonderful cooked lunch!
Does it get any better..? Try this. Amongst the awaiting post, there was an official HM Customs & Revenue letter which made the heart sink at first, but on opening the same, found it to be a refund! Yes, you read rightly, a refund.. Not much, but better than the other way.. So all-in-all, it was a good day.
So I thought we could finish the net making project and show you some pictures..
Looking back to last time, we were starting to make the centre screw which holds everything together. I had turned it to 3/8" diameter and to the right length so the next step was to put on the knurled grip. To be honest, my knurling isn't up to much and rather than make half a job of it, thought I could make a good grip by broaching some semi-circular grooves along the length., like this..
..which made a surprisingly good grip; in fact, far better than diamond knurling, so was happy about that. The next step was to put on the thread. I bought a new 3/8" BSF die but in the end, didn't use it as dies seldom cut nice threads and if they are true to the axis, it's more a matter of luck. I think split dies are more for just cleaning up threads than cutting them from plain bar.
The best way is to single-point, screw-cut threads to the effective diameter, which I did here, using a 55 degree tip tool.
After parting off, the end was faced off and finish turned. All is now ready for building up..
The first step was to fit the ferrule to the handle. I did this with black, 15 grade, 'Celebrated Talbot' nylon, edged with fine copper wire and varnished; likewise the ends of the brass arm straps and the ends of the arms..
Next we fitted the net. Getting one turned out to be easier than thought. After several fruitless enquiries to many companies, the answer lay very close to home all the time. Snowbee, it seems, supply replacement soft fine mesh nets-in green-the biggest suitable for 86" circumference, round net frames. As my net has 30" arms, one of these fitted a treat! I'm not wild about the finishing of them however, so might make a better one later, but at least it allowed progress to continue. The pictures don't do the net capacity justice. It is in fact, very roomy and easily stretches out to quite big. I am sure it would accommodate a 30lb fish without too much trouble..(I should be so lucky!)
I joined the arms with green, parachute cord, which is very soft and supple, binding the loops with 6/0 thread and varnishing over. The connections are 13mm stainless split-rings (£1.10p for a packet of 10) and I used the same to attach the net to the base of the arms. Fitting little attachment loops to the brass straps made it a very easy job indeed.
The net was assembled and that the spigot fitting inside the spreader block made it absolutely rigid! I tested it and found that there was no 'give' at all and no strain on the arms, even when lifting a considerable weight. Yes, I know it makes for extra expense in manufacture, but the difference it makes to support and overall strength is well-worth it. In fact, I think the next net could well have much reduced metal thickness because it is no longer necessary.
Anyway, here is the final product. I hope you have enjoyed the build and it will give inspiration and help to you, if you are considering having a try at making your own..why not have a go? ..You may be pleasantly surprised at what you can achieve...
The 'Water Rail' landing net. wm+ 2014
..it will look nicer with a 15lb common sitting in the bottom!
Regards to all,
wm+
"Are not two sparrows sold for a farthing? Yet one of them shall not fall without your Father knoweth" ..Jesus of Nazareth, King James AV
-
Trevor

- Eel
- Posts: 2271
- Joined: Thu Mar 15, 2012 9:44 am
- 12
- Location: Oxfordshire
Re: Making a Richard Walker Net.
Heavenly fishing, a refund from the government and the fabulous net finished.
Hat-trick!
Hat-trick!
-
Barbulus
- Tench
- Posts: 2508
- Joined: Sun Aug 25, 2013 1:51 pm
- 10
Re: Making a Richard Walker Net.
That looks absolutely beautiful WM+. Really nice write up and the final build up shows a delightful net....superb. Thank you for sharing that project. As ever, I am in awe of the talent within this Forum.
-
Hermit

- Rudd
- Posts: 354
- Joined: Sun Apr 22, 2012 11:44 pm
- 12
- Location: Derbyshire
Re: Making a Richard Walker Net.
Pure genius 
Fishing is worth no more than its pleasure. Bernard Venables.
-
Nobby
- Wild Carp
- Posts: 10983
- Joined: Sun Oct 02, 2011 2:40 pm
- 12
- Location: S.W.Surrey
- Contact:
Re: Making a Richard Walker Net.
Wow! NO flies lost and a tax refund......somebody loves you.
I'm still enthralled by the various materials used and how they complement one another...and who knew Tufnol could be made to look attractive? It reminds me of that long discontinued chocolate confection, Caramac...anyone else recall it?
Thanks once again for sharing Dave!
I'm still enthralled by the various materials used and how they complement one another...and who knew Tufnol could be made to look attractive? It reminds me of that long discontinued chocolate confection, Caramac...anyone else recall it?
Thanks once again for sharing Dave!