I think it was R.S.W. himself who said:. "Never buy anything you can make.." and typical of the practical and thinking man that he was, made everything could to help him catch the great carp-and other fish- that he sought. Not only because such tackle just wasn't available, but he knew that he could make it so much better in every respect and far more suited to the task in hand anyway.
Although we both grew up in roughly the same era, we lived in opposite ends of the fishing spectrum and so I never knew of Richard S. Walker except for the name, which among other household angling names, frequently seemed to crop up in the pages of "The Fishing Gazette". I have never met him-or any other great angler of that period-and have never met anyone who had, but like millions of others, his abilities in fishing and sheer inventiveness struck a loud chord of encouragement to try harder for success-which is always there for the finding..
Quite recently, I started to re-read my old copy of 'Drop me a line', a book which needs no introduction, and re-discovered anew, just how inventive and determined he was.. It's odd, how you can pick up a well-read book-and still see it in a new light!
The thought of making a copy-or something like it-of his landing net has been germinating for some time now and the recent posting on this has brought matters to a head.
I know that another worthy member is making plans to manufacture parts for these and this is in no way whatsoever meant to detract or take away interest from that, rather, to contribute toward it and complement it in as many ways as possible.
I have never tried to make one of these before and so it will be a new learning curve; but am confident that it is not beyond any of us to do so. This is not intended to be for sale, profit, personal gain-or anything other than my own tribute to someone I never knew. I want to try and make first, a usable net of similar design, solving all the problems as we go along-and if that works, make two 'proper' ones, which will be stamp-numbered Nos.2 & 3.
This thread will be as a basic, step-by-step, taking in every aspect of the production, so I hope you will not find it too boring or repetitive. Where a process is repeated, I will refer back to it as appropriate. I do hope it will be of interest and all contributions and suggestions will be more than welcomed, especially if anyone reading this actually has an original net...!
This then will be the 'R.S.W'. Net No.1.
From reading what I can, it seems that the handle was made from either Tonkin-or Burma cane and was 5' 3", or thereabouts, long and in the region of 1" diameter, although that seems to have varied quite a bit. I do not have any such canes, but do have a small stock of well-seasoned Greenheart wood, which although is heavier, is very straight and very strong indeed.
The net arms themselves are from laminated cane, but in order not to spoil the 'good' ones, I am going to make the arms of the first net also from greenheart. They should be 36" long, but in this first net, they will be 30" only,-as with the first 'Walker' net.
I now have some measurements for the net 'head', to which the arms are attached and hinge, but am not going to stick rigidly to these on this occasion. As I see it, everything depends upon the measurements of both the arms and the diameter of the handle.
You cannot make the net head until you know the exact width of the arms at the base and you cannot make the handle ferrule until you know the size of the handle! In a production run, these would have to be standardized to ensure a good fit..
..well, rightly-or wrongly, that is as how I see it, so without further ado, let's make a net!
Part 1. Making the Handle and Top Ferrule
..the 'Top' ferrule being the one which the net 'Head' locates on and is screwed to by the long bolt.
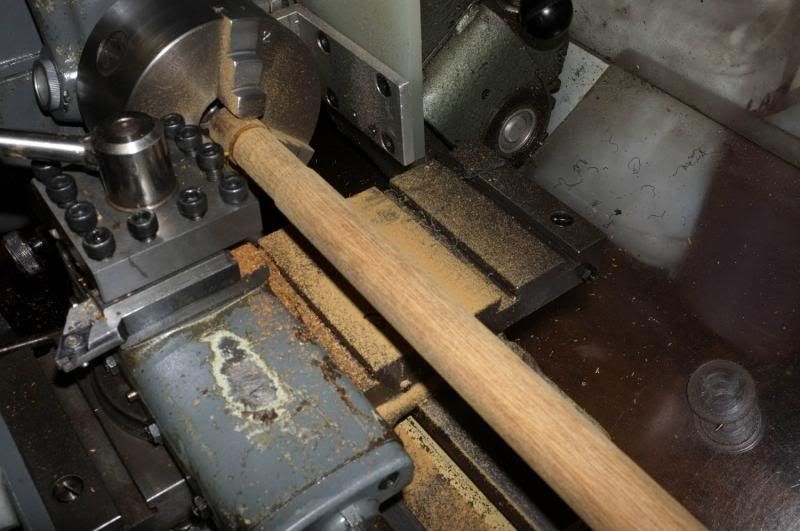
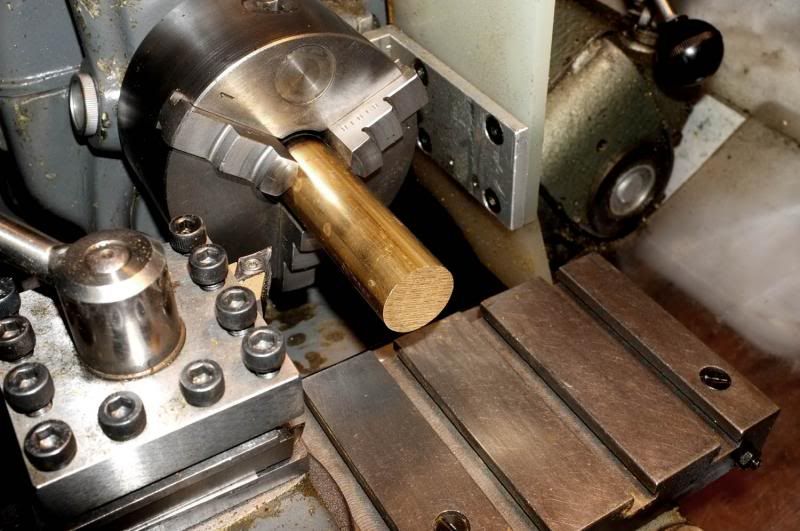
As said, this will be from greenheart so the first thing was to turn a 5' 3" length of it down to make a nice tapered handle.
I gained some invaluable experience on this whilst making the 'Traditional' round net, and so once again, the lathe was at full stretch, with wood 'steadies' screwed to everything to stop it flying out of the lathe! If you have a similar machine and are having a try at this, keep the revs. down to less than 200..or things start getting out of control..
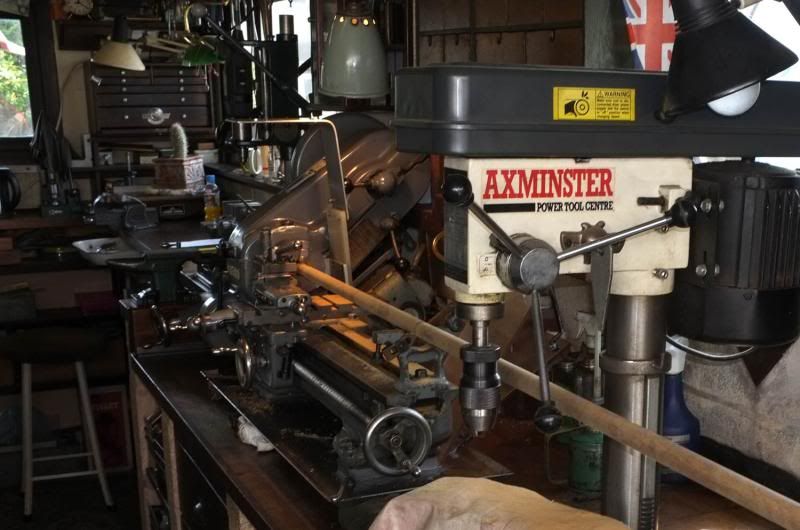
The pillar drill is in no way involved in this, apart from being in the way, but as space is limited, we have to get around things like that-literally.
Anyway, we eventually managed, with lots of abrasive, to get a reasonably tapered handle, except that in this case, the top diameter will be a little less than 1", not that it matters..
The second stage was to turn a 'stepped' diameter, on which the ferrule will be pressed on..
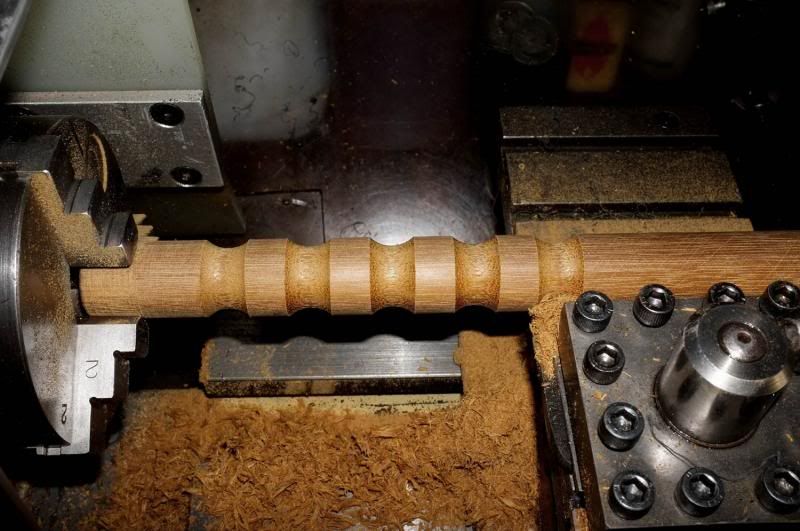
I know it's not as the original, but I enjoyed making the handle 'grip' pattern on the 'Traditional' net, so have repeated it here. (Note to Turners..The tool is nothing more than a piece of H.S.S. off-hand ground to a 9mm radius. Keep the revs. down to about 150 and lightly hold to steady the 'chatter' and allow the tool to 'sound out'.)
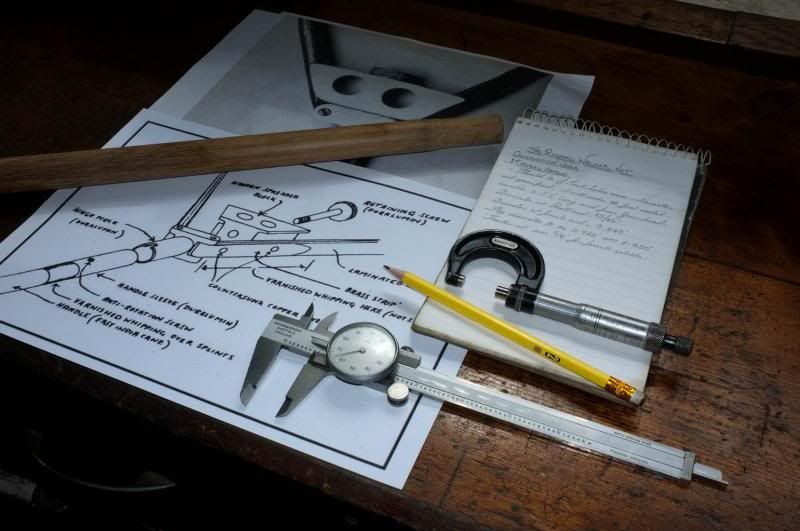
I am going to finish the handle with raw linseed oil, but that's about as far as we can go with it for now. The next step is to make the ferrule on to which the net head will locate. I am keeping a note of everything as we go along and making some drawings for future reference..
To make this is much the same process as described in the previous net, but will go through it with you for the sake of clarity.
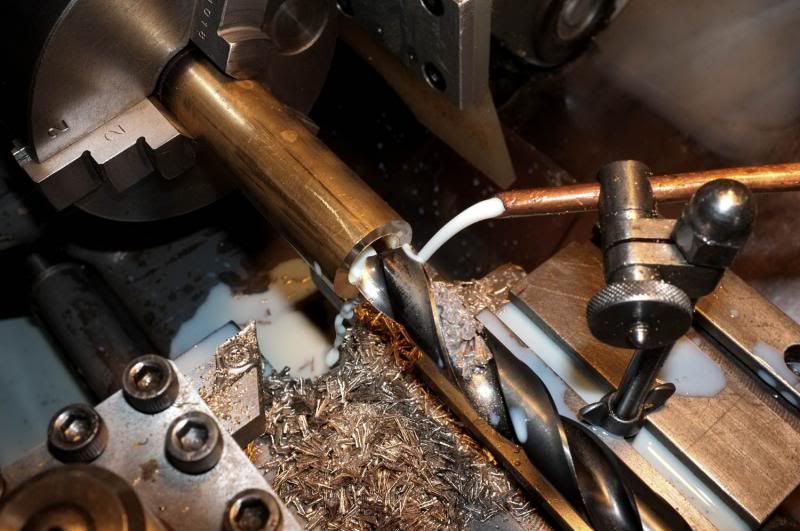
First, load up a billet of good quality brass..
Make sure is is secure in the chuck and cannot 'push back' in the jaws whilst drilling, then face off, spot drill then use a big drill (a bit less than finished size) and drill to depth. Next, drill 21/64" to depth of ferrule, plus 1/8" for part-off.
Bore the inside to finished size which must be a light, press fit on the handle.
Now turn the outside to finished size and turn a tapered step of 1/2" for the splint end. The odd, criss-cross lines are the first stages of 'draw' polishing, which is used when it has to be a mating fit with something else. It eliminates the risk of a ferrule picking up dirt and grit and subsequently jamming up.
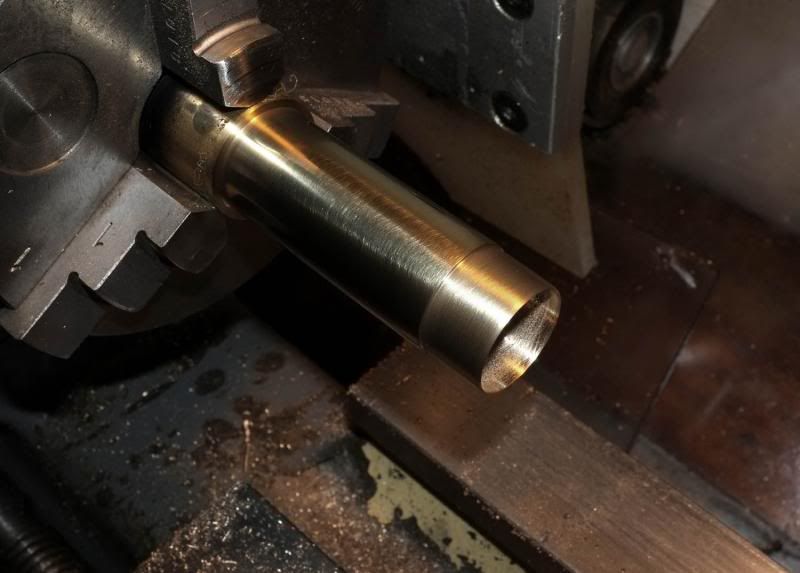
I have now removed the unfinished ferrule and marked out with black marker pen, the areas to be filed out to produce the splint end. That is why that part was turned as a taper. The blackish area on the left is where I chemi-blacked the last ferrule..this is the same piece of material!
The splint end has now been filed out and must be de-burred of all sharp edges before parting off..
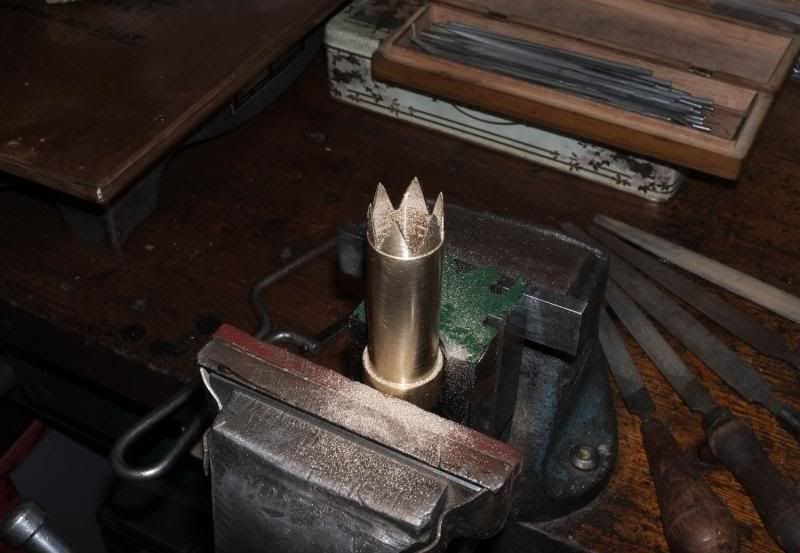
We are now parting off.
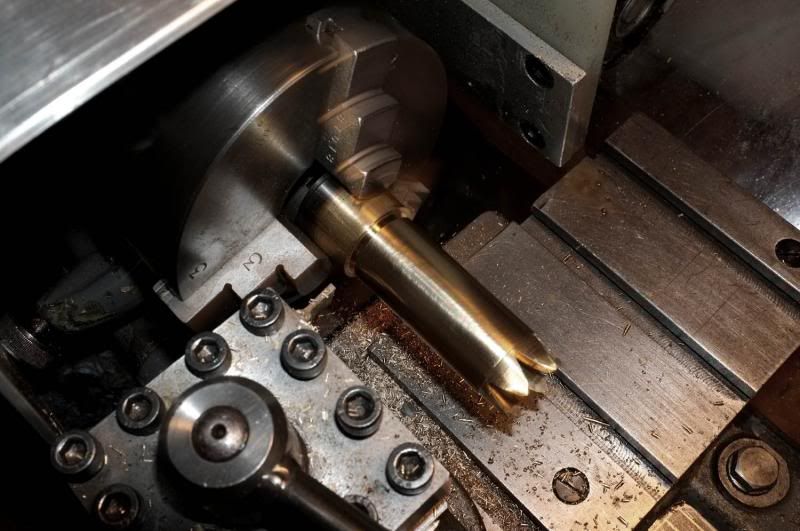
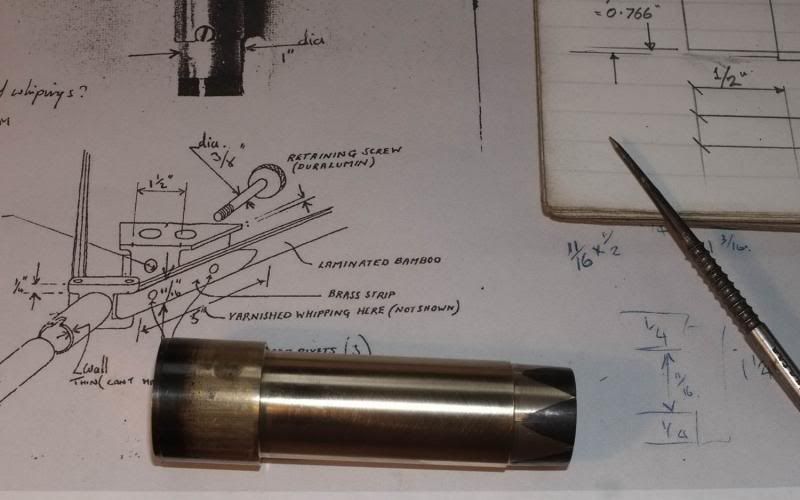
The next step is to reverse it in the chuck (taking great care not to mark- or deform it), tap the 3/8" BSF thread through, chamfer and face off and clean up. The small holes you see on the face are merely to remove excess material for lightening, nothing else.
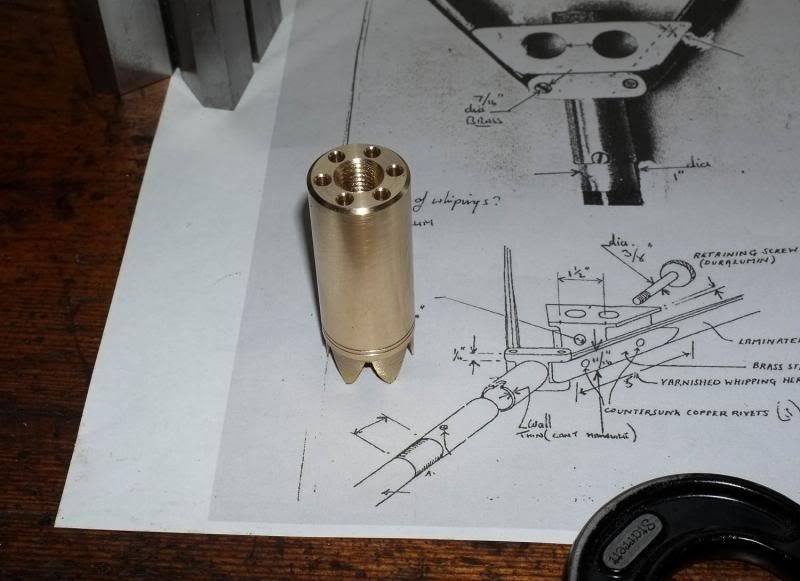
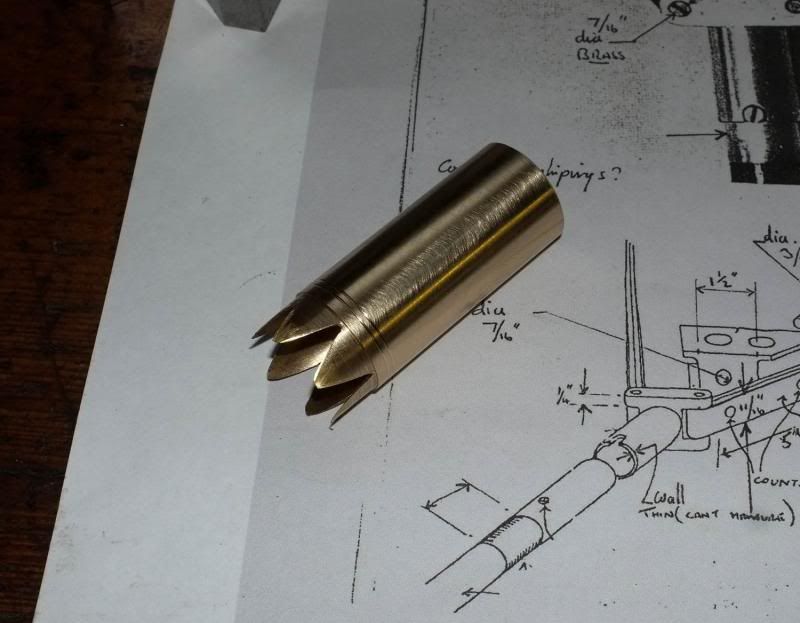
Here is the finished ferrule, all ready for fitting to the handle, which will be done later. It is next to where it is drawn on Richard Walker's original sketch.
So then, we have made a start!
Next time, we will be making the net arms complete..and after that, the bit most of you want to see....
With regards to all,
wm+